Trouble shooting the Game loading, Creating a Character and setting up the gameplay.
- Software/Hardware Issues.
- Game Save/Restore.
- Creating a Character.
- Tutorials/Quests.
- Game Types & World settings.
- Keybinds (Settings).
- Starter Kit.
- Basic Crafting in Character UI.
- Death and Dying.
- Lock Picking.
- So, What Next?
Software/Hardware Issues
This section is to try and solve any issues that might occur when loading the game or any crashes whilst playing.
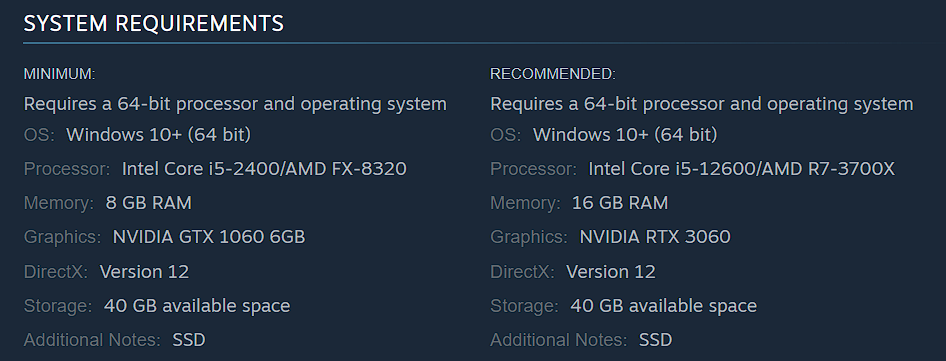
First, Do you have the required equipment to run the game and also ensure that there is enough free space on the installed HDD preferable a SDD.
Try:
- Do a search of Google with any error messages that occur as that might give clues to why its not working.
- Look in the Crash Logs.
Crash Logs/Files are in:> Drive C :Users\”Name”\AppData\Local\WRSH\Saved\Crashes
There is a folder for each crash and “CrashContext.runtime-xml” has the error message in it. If posting on Discord include the txt and dmp files.
Next try:
- Ensure you have the latest Graphics Card drivers installed.
- Make sure Windows is updated and the relevant Microsoft .NET framework 4 and Visual C++ runtime files are installed.
- Check if Dx12 is installed correctly. In the D3D12 folder, if there is only the D3D12Core.DLL file then reinstall.
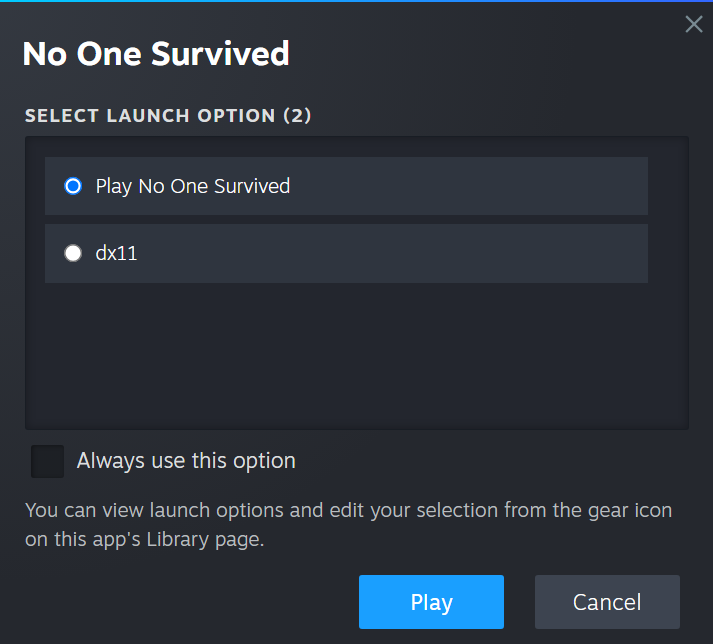
- Try switching from DX12 to DX11.
- If the UI cannot be selected, press Alt+Enter.
- If your Graphics Card is an RTX Graphics Card, turn on DLSS, which should improve the frame rate.
- If you load to a blank screen, make sure your Anti Virus (AV) has the game as an exception.
- Have Steam set to “Run as Administrator” and/or remove the Steam overlay whilst playing.
- Verify the Steam game files.
- Keep NOS and Steam installed on the same drive especially if you get “Start Steam to verify game” message when launching game.
- It’s been noted that if the main menu tutorial is played before creating a character in single player, the game will crash. Update 1.0 should have resolved this issue now.
- Lastly, Uninstall and Reinstall the game in Steam.
Switching from DX12 to DX11 manually:
- Open Steam and select Library
- Right-click on the game you want to run
- Select Properties > General
- Type -dx11 into the Launch Options command field
- Close the window to save
If you still have issues..
Then post on Steam or the official Discord with as much detail and information as possible and include what you have done to try and fix the issue to date.
Game Saving
Auto save is found in the Escape Menu “Controls” at the top once the Character is in game and it can be turned Off/On.
In Single Player, you can “Save Game” in the Escape Menu or use the Admin Menu.
In MultiPlayer (Co-op), the Host can “Save Game” in the Escape Menu or use the Admin Menu.
In Private or Dedicated Servers, Progress is saved on exit and the Server should have a regular Autosave and there is no or limited access to the Admin Menu.
Use at your own risk!– When you exit that game in Single Player it will automatically create a save point. If something drastic has happened and you want to restart without saving (losing progress!! but going back to before you died or lost something important), you can CTRL/ALT/DELETE and end the No One Survived task in the Task Manager then reload the game to the last saved point or use the Restore Game options below.
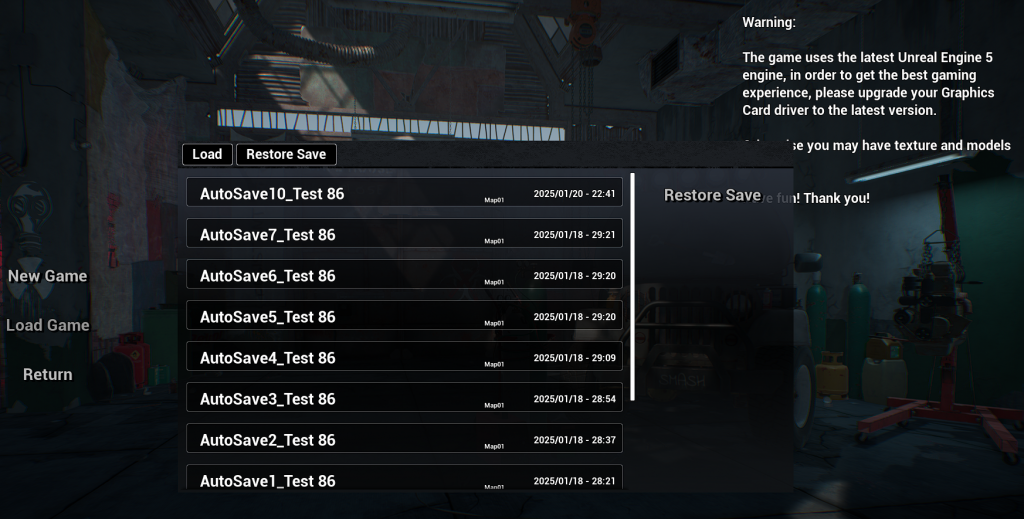
Restore Save Points
Log into any Character and go to “Load Game“. The entries are shown in newest or last used order.
This example will be “Test86”.

Now click on “Restore Game” and these entries are shown in oldest or last used order. It will now show all the Game names and the Maps used.
IE: Test 86_Map01
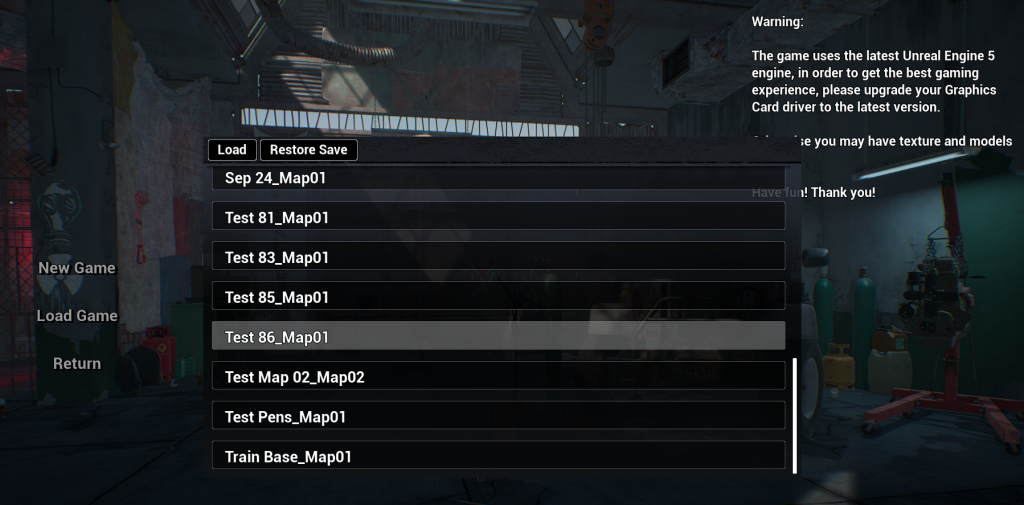
Clicking on Test 86_Map01 will list all the available save points in chronological order for that Game/World.
Select the one you wish to revert back to and accept the confirmations.
Current Progress will be lost when restoring Saves!
Saved Data is found at the below locations but edit, move or delete or your own risk, if not sure then leave it alone!
- Drive C :Users\”Name”\AppData\Local\WRSH\Saved\SaveGames\AutoSaves
- Drive C :Users\”Name”\AppData\Local\WRSH\Saved\SaveGames\WorldSaves
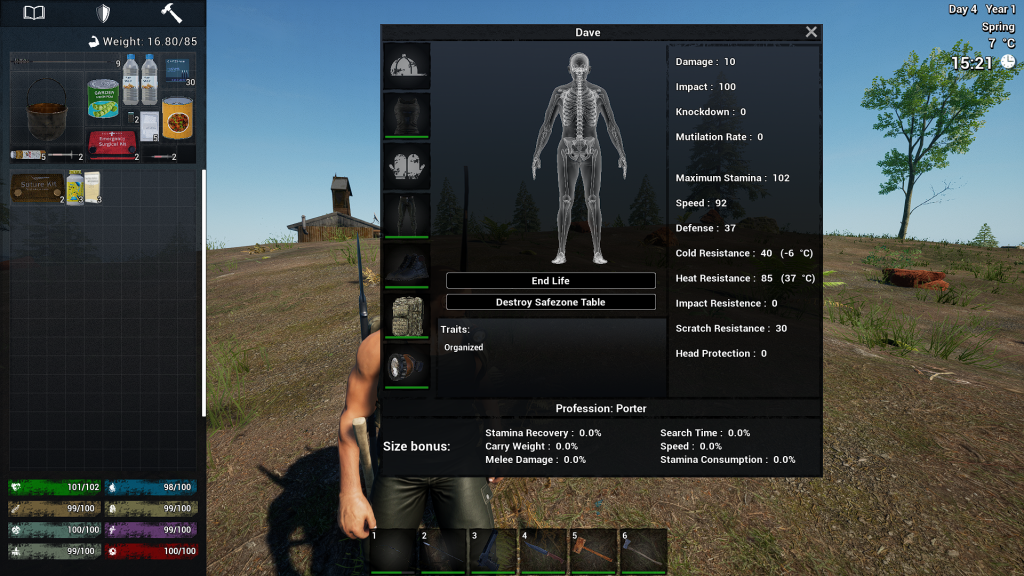
Creating a Character
Character creation and what the pro’s and con’s are for Attributes/Traits and Professions.
You can create and keep up to 5 characters.
Porter is the most common profession selected for the extra Carry Weight.
The biggest thing to consider is the Body Type (General) as to whether you are fast and agile or sturdy and slow.
Tutorials- Quests
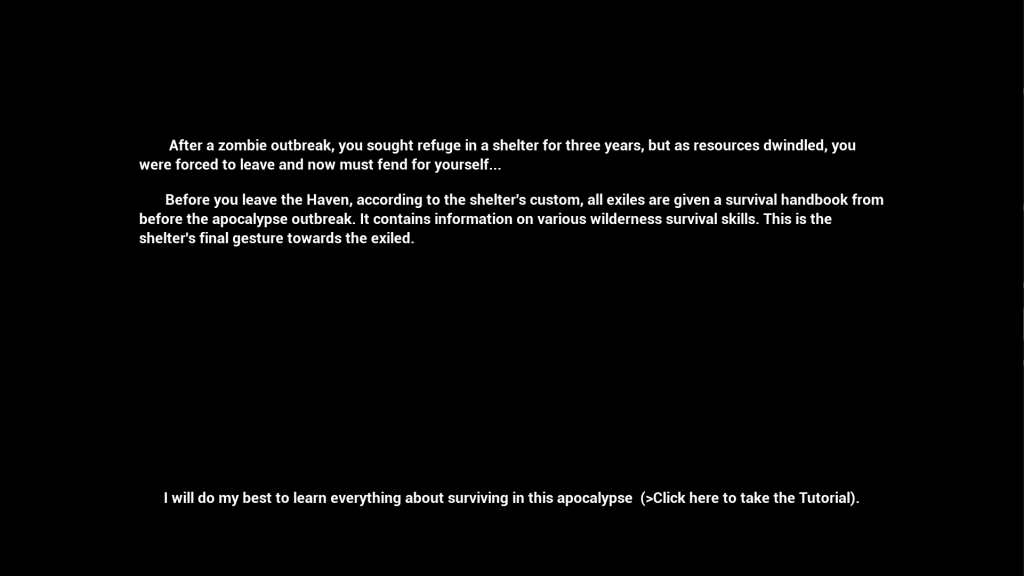
Out of Game Tutorial
If you don’t create a Character first to go through the tutorial the game crashes! Update 1.0 should have fixed this.
Although it doesn’t cover everything it is a good starting point for the basics and is the top option in the Main Menu. >>
Update 1.0 added a new in game Tutorial
It’s simple tasks to show you the basics of the game and to guide you to the Traders. There is also a new “Quests” tab. >
The Admin Menu can be used to auto complete tasks and you can remove the tutorial by unticking the box in the top left of the screen in the Quests tab. >
In Game Tutorial
Update 1.0.0.2 introduced that after creating a Character in Single Player if you don’t click anything on the black screen with white writing, you will enter the game after 10 seconds.
The Tutorial is unavoidable but can be unselected in the Quest tab in the Inventory.
| Tutorial | Quest Name | Task | Reward | Tested |
| Resource Collection | Collect x5 Sticks and x5 Stones | x1 Wooden Stick and x1 Stone | Y | |
| Basic Tools | Craft x1 Stone Pickaxe and x1 Stone Axe | x1 Wooden Stick and x1 Stone | Y | |
| Resource Collection 2 | Chop down x2 Trees and break x2 Rocks (Stone node) | x1 Stone Pickaxe and x1 Stone Axe | Y | |
| Basic Workbench | Unlock the Crafting Table | x1 Log | Y | |
| Primary Smelting | Break x2 Clay ore and collect x10 Clay | x1 Clay | Y | |
| Survival Guide: Simple Wooden Spear | Craft x1 Wooden Spear (On Person) | x5 Sticks | Y | |
| Seeking A Way To Survive | Talk to Hank | x1 Wooden Stick | Y | |
| Lifeline: Contact Maria | Talk to Maria | x1 Wooden Stick | ||
| Cutting Edge Tech: Visit Mike | Talk to Mike | x1 Wooden Stick | ||
| Wilderness Phantoms: Visit Sarah | Talk to Sarah | x1 Wooden Stick | ||
| Full Speed Ahead: Visit Li Na | Talk to Li Na | x1 Wooden Stick |
A new quest system involving the different Traders in addition to the Tutorial came with Update 1.0. More information is here.
A Single Player game can be started and the Admin Menu used to enter Creative Mode to get use to building and the items the game has to offer.
Character use between Games/Worlds
Any Character you create can enter any world or Saved Game you have created but the Skills, Technology Tree unlocks and Inventory is bound to that World where they are first gained.
The starting Attributes and Profession choices are locked in to that Character but everything else is reset if entering a new world/game. Each character will each have their own spawn and logout points and if you want to play in a MultiPlayer game and also your main Single Player saved game, you can with no issue.
Just be careful when deleting Characters!
Game Types & World settings
How to start a Single Player game and set up of the world settings.
The Game Settings can be changed once in game by opening Inventory and clicking on “Information”.
Keep track of which game save or world a character is used in and only delete Characters you no longer use!
When a character is logged out of the game they take everything on them with them and no sleeping body is left behind.
How to select a character then either Host or Join Multiplayer.
This is when a friends hosts the game and you join or vice versa,
To join a Private or “Dedicated Server” the game has to be closed down between selecting game types so all games or “Rooms” show on the list.

Time runs constantly whilst there are players logged in a Dedicated Server.
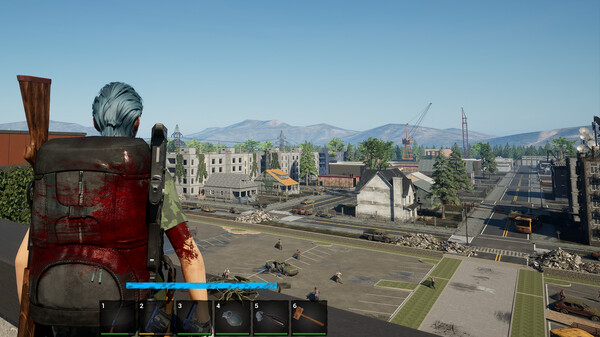
Update (0.0.8.7) New Players in Multiplayer Mode now receive different starter clothing based on the season (See below).
key binds (settings)
Keybinds or “Controls” only appear once the character is in game.
Pressing “Escape” will pause the game (in Single Player only) allowing you to set your Movement and Function keys.
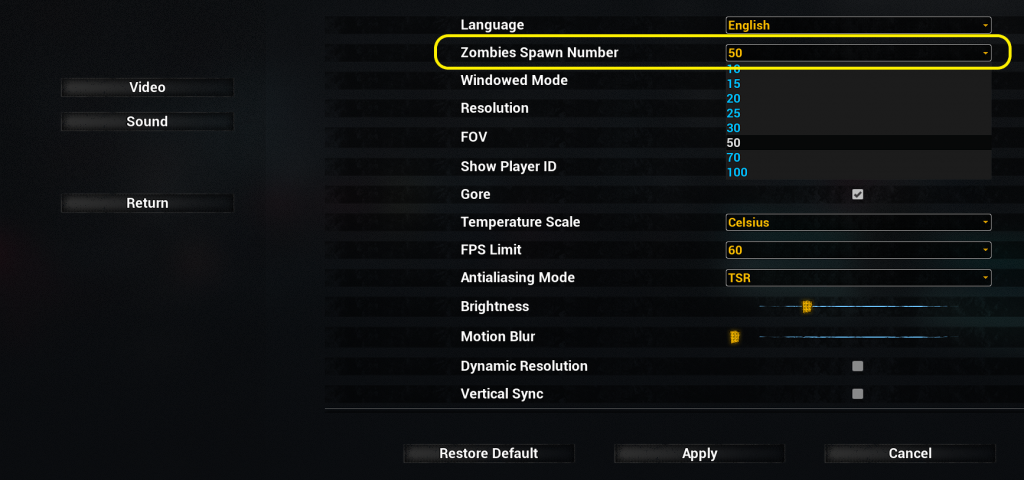
This Video Setting determines the amount of Zombies that can appear on your screen at any one time.
If this is set too low it can mistakenly seem like Zombies spawn out of thin air or too high and it lags the game.
(IE:Setting=10) So if there were suppose to be 15 Zombies in that area, only 10 would show but if you agro some and kill them the extra 5 will spawn in that area and attack!
Starter Kit
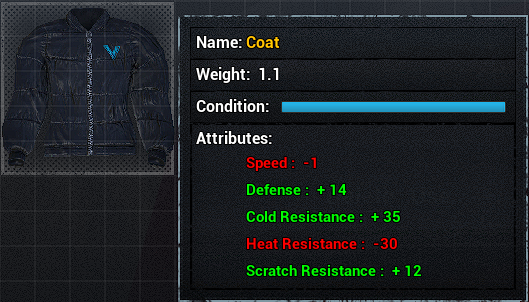
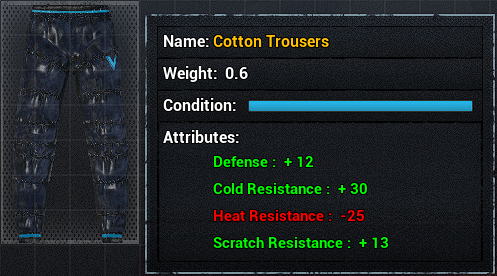
Update (0.0.8.7) changed the Starter Kit to reflect some kind of story lore. The kits below is for Spring and Summer and in the Autumn and Winter the kit changes clothes to warmer gear.
- 9 Steel Arrows.
- Cooking Pot (more info here).
- x2 Food Cans and Bottled Water.
- x2 Small Batteries (Drag Shoulder Lamp into Inventory and right click to charge item).
- 30 Rnds of .44 Ammo.
- Meds- (more Medical info here.)
- x3 Antibacterial Gauze.
- x1 Surgical Kit.
- x2 Haemostatic Powder.
- x1 Antiviral Serum.
- x1 Adrenaline.
- x2 Dysentery Medicine.
- x2 St John’s Wort.
- Steel Spear (Very Used Condition).
- DE Pistol (Very Used Condition and Unloaded!)
- Kukri (Very Used Condition and can be used for Dismantling).
- Tank Top, Casual Trousers and Leather Shoes (All Good Condition).
- Small Red Backpack.
- Shoulder Light (Needs recharging with a Small Battery and Press T for the Light).
Some Attributes/Traits and Professions that change the load out of the Starter Kit:
The below items are added or removed regardless of starting naked or with the Starter Kit*
| Attribute/Trait | Items |
| Unprepared | -50% Food & Water (-1 Water Bottle and -1 Canned Food) |
| Survivalist | +50% Food & Water (+1 Water Bottle and +1 Canned Food) |
| Book Collector | +x2 Magazines (+10 Mood) and x1 Blueprint: Machining Table |
| Profession | |
| Police Officer | Police Clothing*- (Helmet, Uniform (Top), Trousers (Pants) and Shoes) |
| Farmer | x9 Carrot, x9 Corn, x9 Potato and x9 Wheat Seeds and x1 Hen & x1 Rooster |
| Explorer | +1 Steel Machete |
| Student | A Large Backpack* and 5 Random Books/Magazines |
The Police Clothing replaces the T-shirt, Trousers (Pants) and Shoes from the Starter kit and the Large Backpack is replaced for the Small Red Backpack.*
Basic Crafting in Character UI
How to craft from your Inventory. No experience is gained when making an item in your UI.
Death and Dying
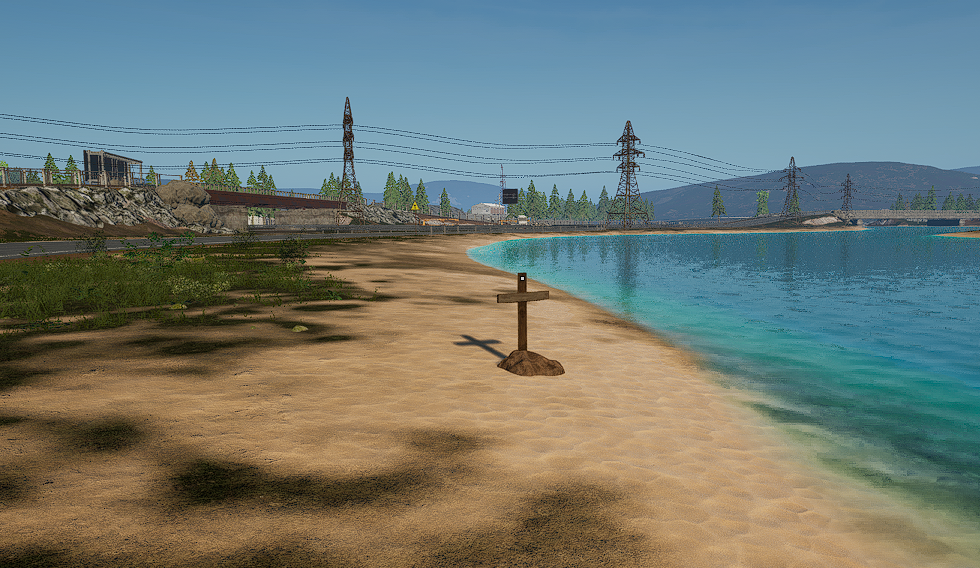
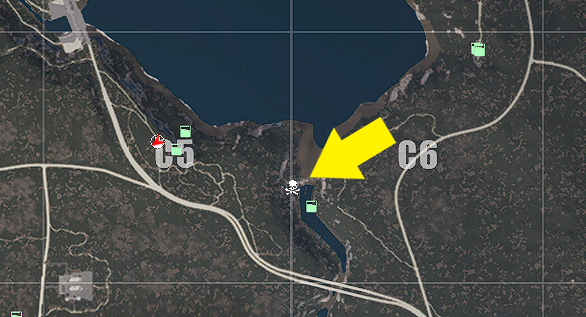
Dying or being killed is going to happen. When you lose all Health points you drop ALL items at a Grave site and you have to travel back to it to collect your gear!
Update 1.0 now marks where you died on the map.
Do not log out of the game without recovering your body first as the Grave Site Marker will disappear and the body will despawn! Note: This has said to be addressed but best to be safe than sorry.
Lock Picking
Lock Picking
Top Tip: Either press “F” or move mouse sideways but not both at same time!

Crowbars (Iron or Steel)can sometimes open locked doors with Steel Crowbars having the best chance.

So, What next?
So your in the Game and not sure on what to do, where to go first or what should be your priorities to begin with? These guides below will help you make informed choices but you enjoy the game at the pace you set.
Good luck Survivor!
Check out Vee’s Articles >
Check out all the Guides covering all the aspects of the game with and each Game Update covered as they are released and all being updated regularly.
Wondering how to do things?
@313VeeGaming.com
Building a Base?