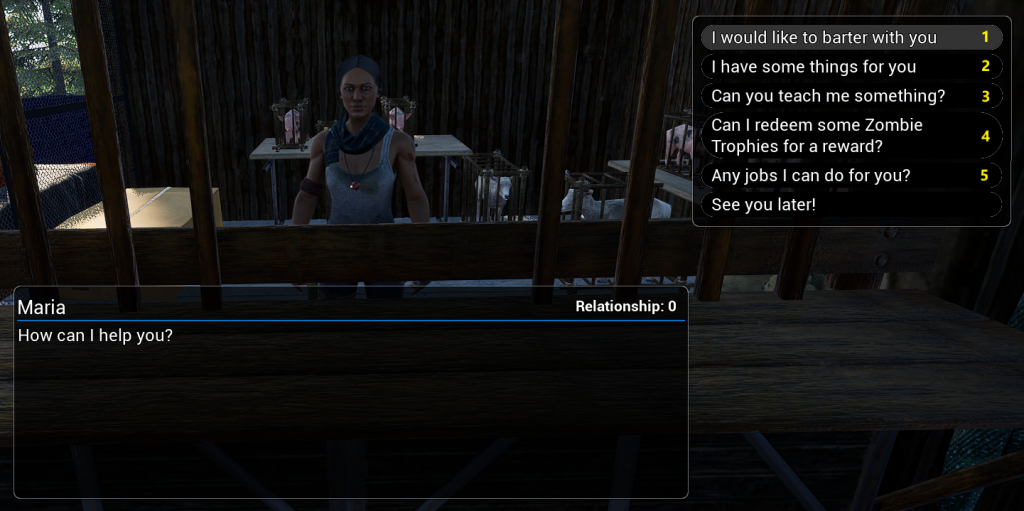
A Look at Traders and what they have and where
- Bartering/Trading (Option 1).
- Increasing “Relationship” (Option 2).
- Learning Skills (Option 3).
- Barter with Zombie Teeth (Option 4).
- Trader Quests (Option 5).
- Update added items.
- Trader Locations on the Maps.
Traders do not use a currency but barter with items and each item has an preassigned decimal value.
You can get better deals if you have the Trade Master ![]() Trait (+15%) or give away items (Option 2) to improve your Relationship with the Trader. Medical items, Weapon Mods and Weapons are worth more than common items found or crafted.
Trait (+15%) or give away items (Option 2) to improve your Relationship with the Trader. Medical items, Weapon Mods and Weapons are worth more than common items found or crafted.
As of Update 0.0.8.6: All items now have a “condition” except for Weapon Mods making them the best “trade” options. The better the quality (the fuller the Blue Bar on the item) the more valuable it is.
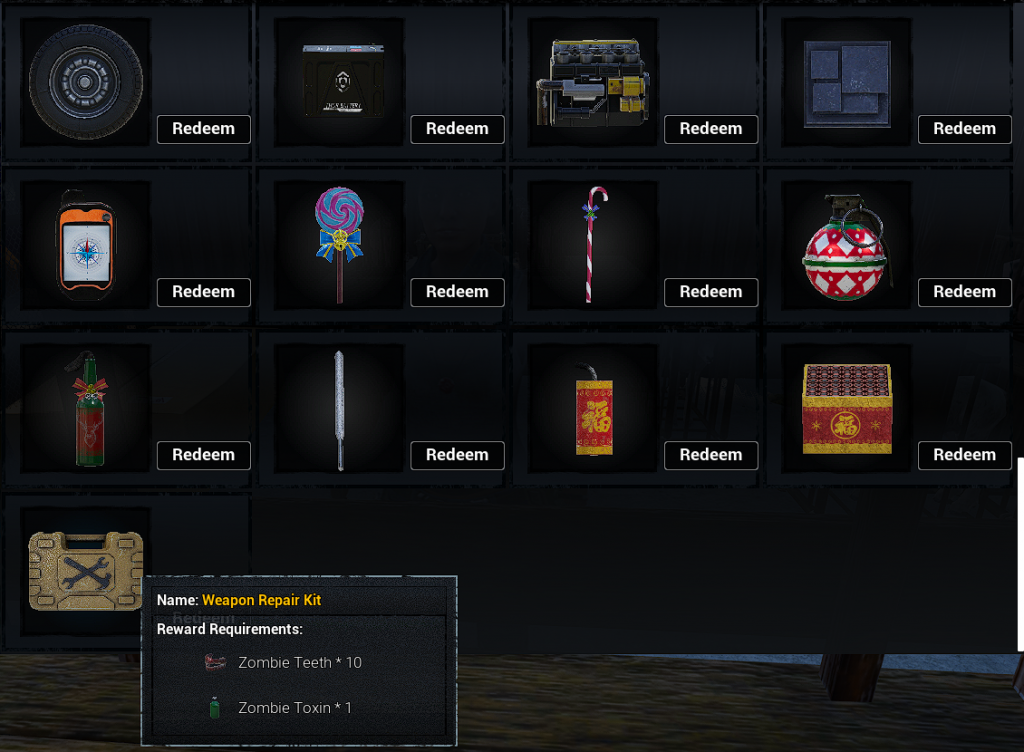
Update 0.0.8.7 Weapon Repair Kits were introduced which can repair all Melee Weapons and Tools and are available to trade at the Merchants/Traders for x10 Teeth and x1 Toxin.
Update 0.0.9.4 added a vocal “tone” to Merchants upon interaction.
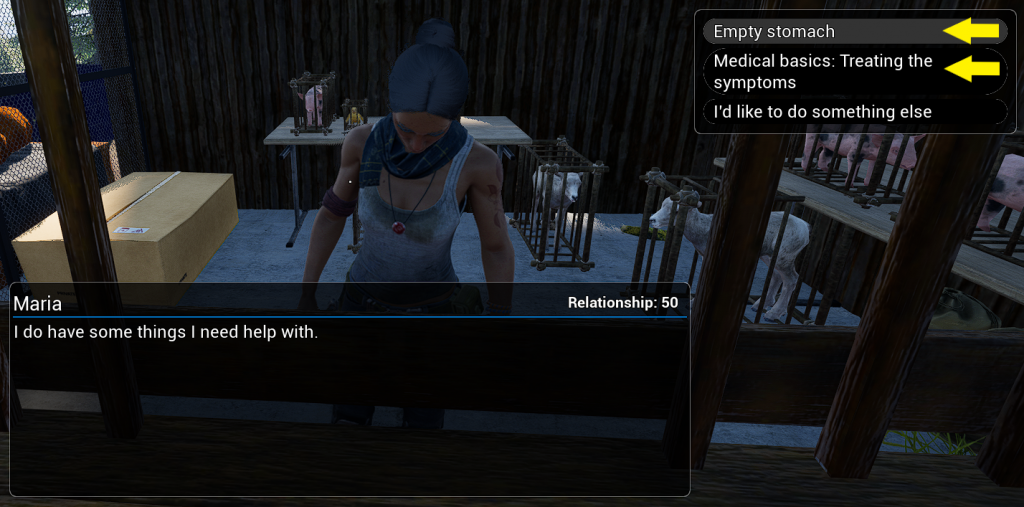
Update 1.0 added a new UI to the Traders as well as removing the old Trader missions (now the Signal Tower – More information here ) and adding a new Quest system.
Option 1
Each Trader will have different things to “sell” and when bartering you drag what you want from their side into the middle right and what you want to give for it into the middle left. The item for “sale” will have a value
IE: Ammo giving 17.254 vs A Pig costing 16.401
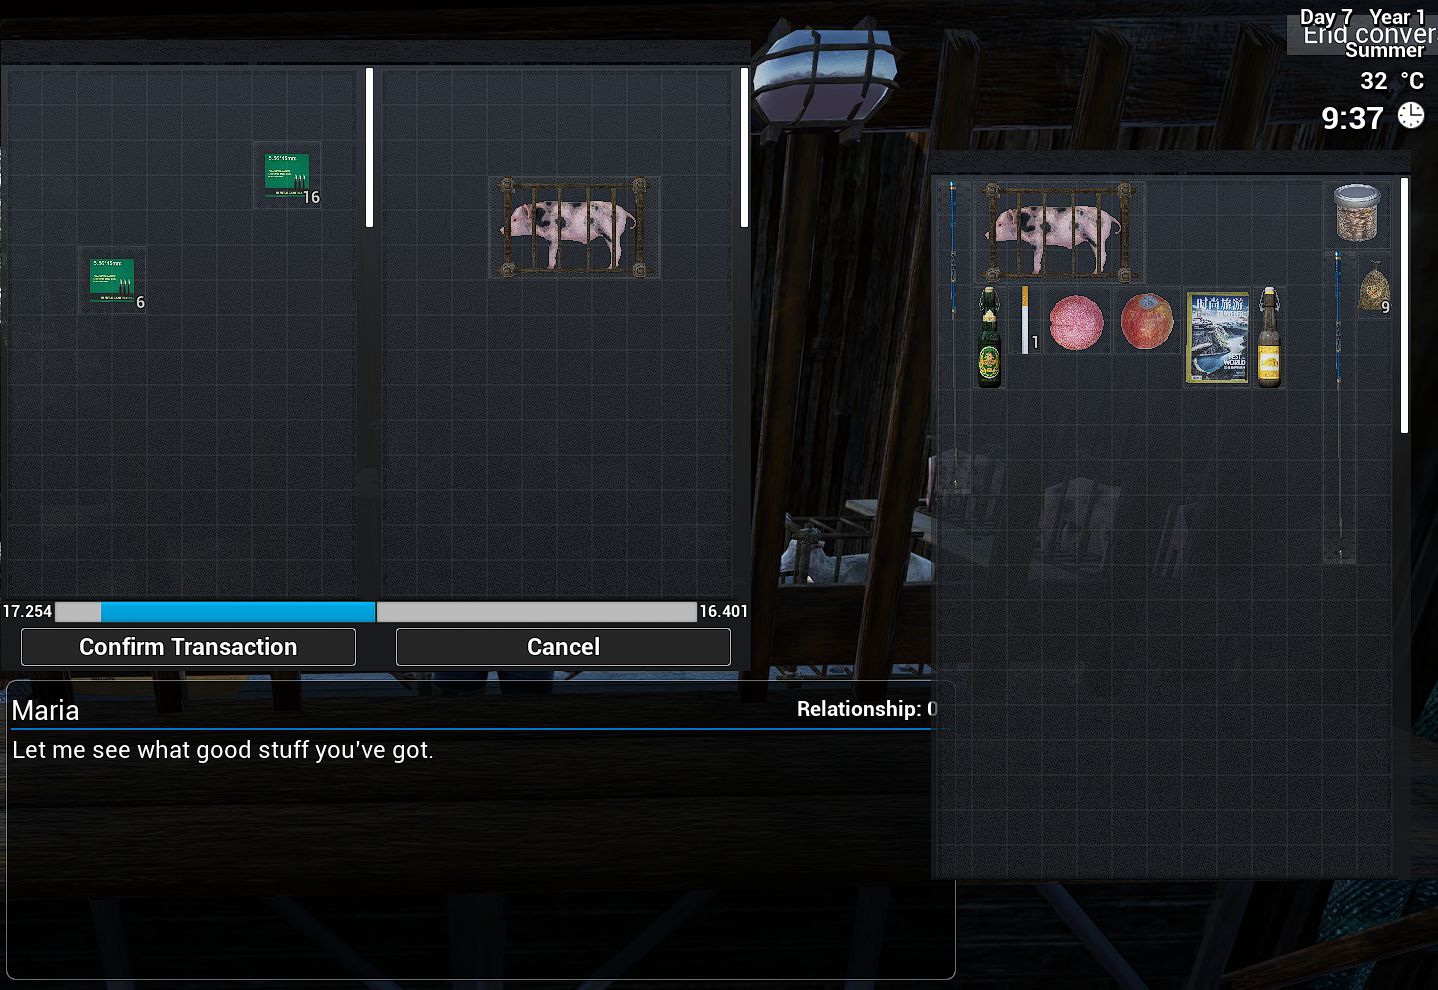
As long as the bar is blue (meaning your item or items is worth more than theirs), the transaction can then be confirmed transferring your items to them and their items to your Inventory.
If you have a full Backpack, any items not fitting into it will drop to the ground.
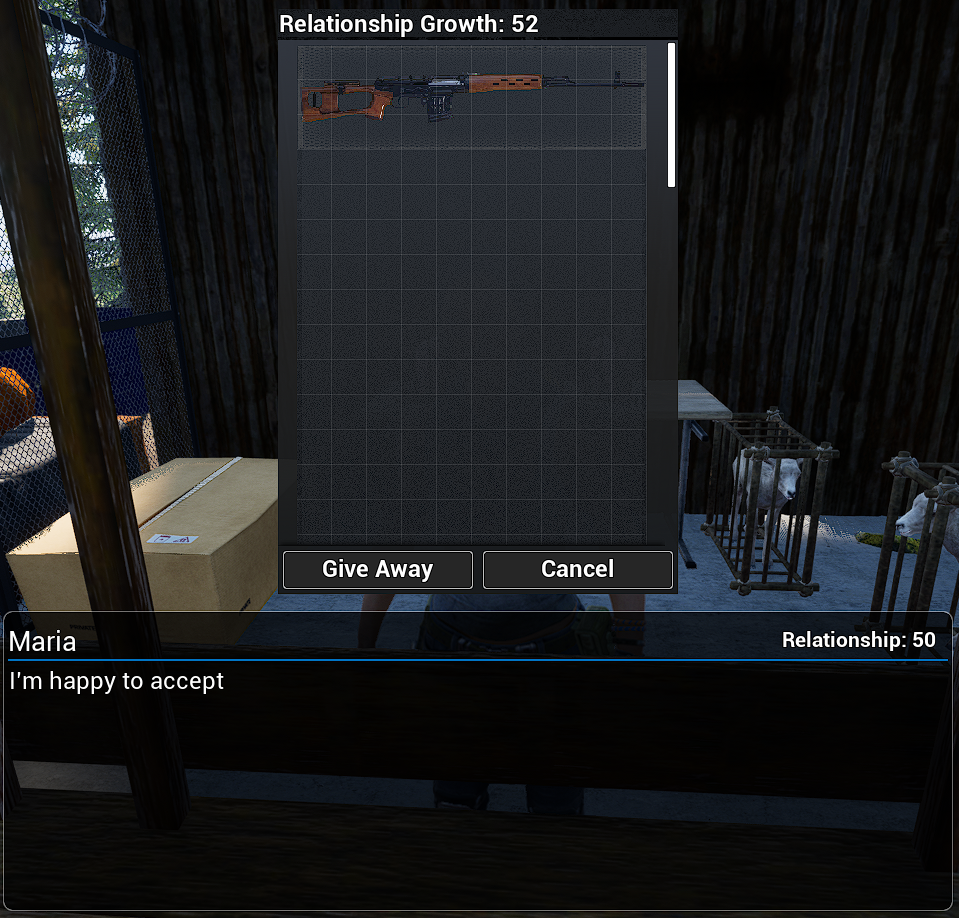
Option 2
This video shows how to give items away to add to the relationship which then in turns allows you better deals (if kept at that level) or to learn skills.
Update 0.0.86 introduced Looted items (except Weapon Mods) having reduced “Condition” so things might not be a valuable as they once were.
If you barter enough items to get 100% relationship with the Trader, then you should be able to learn the whole of Skill Level One and a 1/3 of Level 2.
IE: (20+20+20+40=100).
Example
Do not waste items!
In this example there is 50 already “banked” so only 50 is needed so although 2 will be wasted it was the closest to get the full 100 needed.
Option 3
Learning skills will roughly reduce your Mood by 10 pts each time they teach you so remember to carry Cigarettes, Wine/Cider, Magazines or St John’s Wort to regain Mood.
In the video, the player is able to learn Tailoring 1 and a little of Tailoring 2 but the Mood has dropped to 61.
| Amount of Relationship needed per learning instance | Skill Level | ||
| 20 | 20 | 20 | 1 |
| 40 | 40 | 40 | 2 |
| 60 | 60 | – | 3 |
| 80 | 80 | – | 4 |
| 100 | 100 | – | 5 |
Option 4
Killing zombies will result in a chance drop of Teeth, Toxins or Claws which can be traded in for various items.
Most Traders have Vehicle Parts and weapons.
Update 1.0 now has Grave site marked on map so the Grave locator is no longer needed.

Update added items
Update 0.0.8.7– New Weapons: Flamethrower, Tec9, DF122, SAUG—available for exchange at some Merchant/Traders.
New Firework Items: Fireworks (attracts Zombies), Firecrackers (Grenade), Sparklers (Torch)
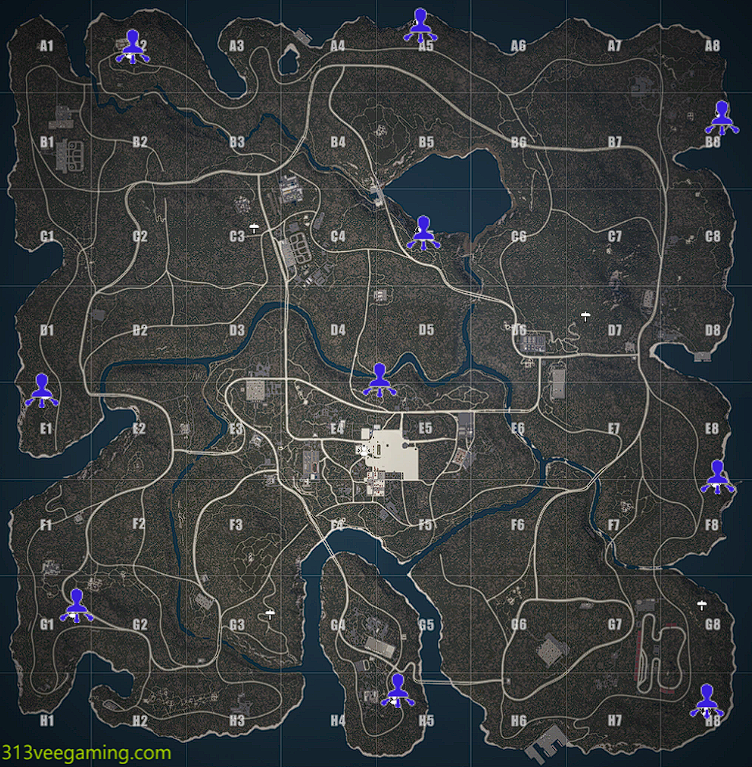
Trader Locations
Map 01
| Grid | Name | Sells | Teaches |
| B2 | Sarah | Animals | Tailoring 1-5 |
| B5 | Hank | Blueprints | Electrical 1-5 |
| D1 | Maria | Guns | Engineering 1-5 |
| C2 | Mike | Car Parts (ERK) | Weapon Crafting 1-5 |
| D4 | Sarah | Clothing | Mechanical 1-5 |
| D5 | Sarah | Solar & Electrical | Medicine 1-5 |
| D6 | Mike | Car Parts (ERK) | Weapon Crafting 1-4 |
| C7 | Maria | Clothing | Tailoring 1-5 |
| E1 | Hank | Animals | Blunt Weapons 1-5 |
| E4 | Mike | Food | Agriculture 1-5 |
| E7 | Sarah | Clothing | Weapon Crafting 1-4 |
| F3 | Maria | Guns | Cooking 1-5 |
| F5 | Hank | Books | Metallurgy 1-5 |
| F6 | Mike | Clothing | Metallurgy 1-3 |
| G8 | Maria | Guns | Engineering 1-3 |
| H1 | Li Na | Special Rewards | Engineering 1-3, Weapon Crafting 1-4 |
Map 2
| Map 02 | Name | Sells | Teaches |
| 1 – A1 | Hank | Blueprints | Tailoring 1-3, Engineering 1-5 |
| 2- A4 | Hank | Food | Electrical 1-3, Tailoring 1-5 |
| 3- B3 | Sarah | Solar + Medical | Electrical 1-3, Mechanical 1-5 |
| 4 – B1 | Maria | Car Parts (ERK) | Agriculture 1-3, Cooking 1-5 |
| 5 – C3 | Hank | Guns | Metallurgy 1-3, Medicine 1-5 |
| 6 – B4 | Maria | Animals | Weapon Crafting 1-3, Tailoring 1-5 |
| 7 – D1 | Mike | Animals | Mechanical 1-3, Metallurgy 1-5 |
| 8 – C2 | Li Na | Special Rewards | Engineering 1-3 , Weapon Crafting 1-4 |
| 9 – C3 | Sarah | Books | Medicine 1-3, Weapon Crafting 1-5 |
| 10 – C4 | Mike | Clothing | Engineering 1-3, Agriculture 1-5 |

Map 03
| Grid | Name | Barters | Teaches | |
| A2 | Mike | Clothes | Agriculture 1-5 | Engineering 1-3 |
| A5 | Hank | Food | Tailoring 1-5 | Electrical 1-3 |
| B8 | Hank | Blueprints & Books | Engineering 1-5 | Tailoring 1-3 |
| C5 | Maria | Animals | Tailoring 1-5 | Weapon Crafting 1-3 |
| E1 | Mike | Food | Metallurgy 1-5 | Mechanical 1-3 |
| E4 | Li Na | Special | Weapon Crafting 1-4 | Engineering 1-3 |
| F8 | Hank | Guns | Metallurgy 1-5 | Medical 1-3 |
| G1 | Maria | Engine Repair Kits/Car items | Cooking 1-5 | Agriculture 1-3 |
| H5 | Sarah | Engine Repair Kits/ Solar | Mechanical 1-5 | Electrical 1-3 |
| H8 | Sarah | Blueprints & Books | Weapon Crafting 1-5 | Medical 1-3 |