Building, Upgrades and Castles
- Building Pieces
- How to Build
- Building Actions
- Wooden Fencing
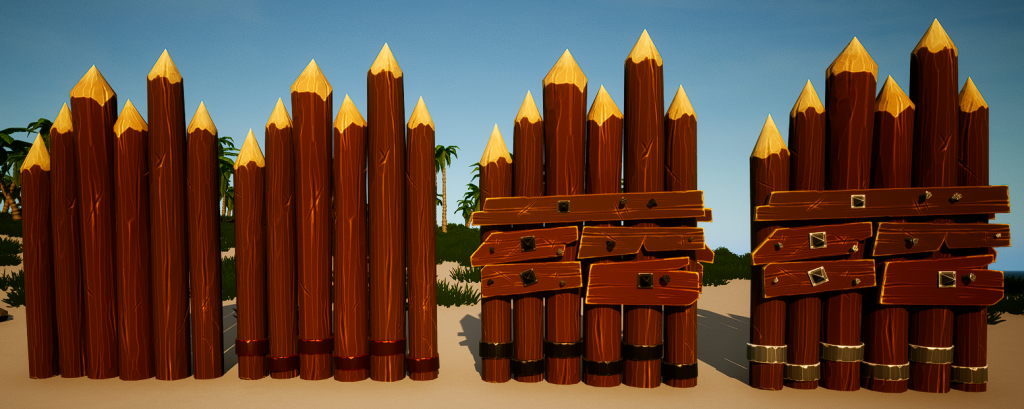
- Palisade and Spike
- Chests
- Watchtower
- Castle
- Castle Designs
Divided Land uses the system of building the Basic Wooden Pieces first in the Inventory and then placing them in the world. Once placed they can be picked up in 60 secs, relocated, upgraded or demolished (if the pick up window is missed). The Building Pieces are the same on both sides so facings do not matter unlike the Castle Wall pieces.
More information on Crafting and Workbenches is here.
More information on Forging, Mining and Tools is here.
More information on Mastery Skills is here.
Overview
The Wooden Pieces are the only building blocks as other building materials are upgrades from the basic Wooden Log structures with Castle Walls being a seperate entity.
The Wooden structure provides warmth which prevents the Cold effect if built in the Cold Region and if built in the Desert it prevents the Heat effect. A Tent will do the same thing as it is quicker and easier to build. More information on Temperature is here.
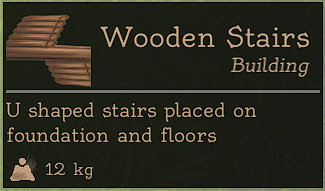
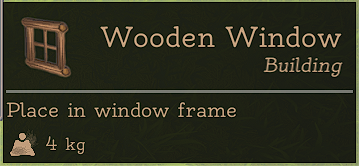
Foundations, Ceilings, Windows, Stairs, Doors and the Roof (4) pieces come pre built and need no construction.
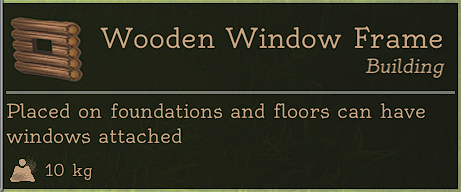
Walls, Window Frame and Doorway need to be completed with a Wooden Mallet. The Mallet can be equipped the same time as a placeable building piece.
Upon starting, every Wooden building piece is available apart from Window Frame, Window and Staircase which is unlocked at level 5.
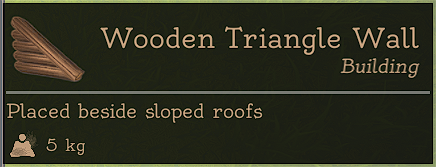
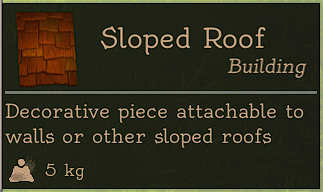
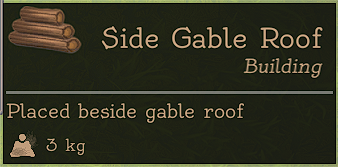
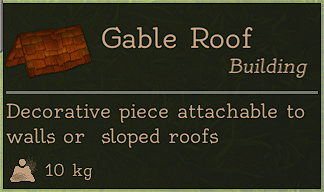
Sloped Roof, Gable Roof , Triangle Wall and Side Gable Pieces are unlocked at level 13 and these are crafted in the Workbench and the Sloped Roof and Gable Roof require Clay to make.
Crafting the Wooden buildings can be done on person or from Chests if within the radius so to avoid being encumbered. Pressing Q or E rotates the item Left and Right in its prebuilt “Shadow” Form” whilst placing the piece, with exception the Foundations which change Up and Down instead.
Put the required item to build in the hotbar, select it and then press LMB when in the right place, RMB cancels the build.
The relevant skills to building found in the Mastery Tab are Basic Crafting (Higher skill= items crafted faster) and Building (Higher skill= Reduced repair costs).
Wood is the main material used in building with the Wood Chopping Skill giving bonus to Logs/Branches gathered. >
| Skill Level | 1 | 2 | 3 | 4 | 5 | 6 | 7 | 8 | 9 | 10 | 11 |
| Resource Bonus | 100% | +120% | +130% | +140% | +160% | +180% | +200% | +220% | +240% | +260% | +300% |
Update v0.5.3 had a Building Health Rework which rebalanced the building pieces and structure HP values.
Building Pieces
The following are available at the games start with items marked with an asterix (*) currently having no upgrade option available.

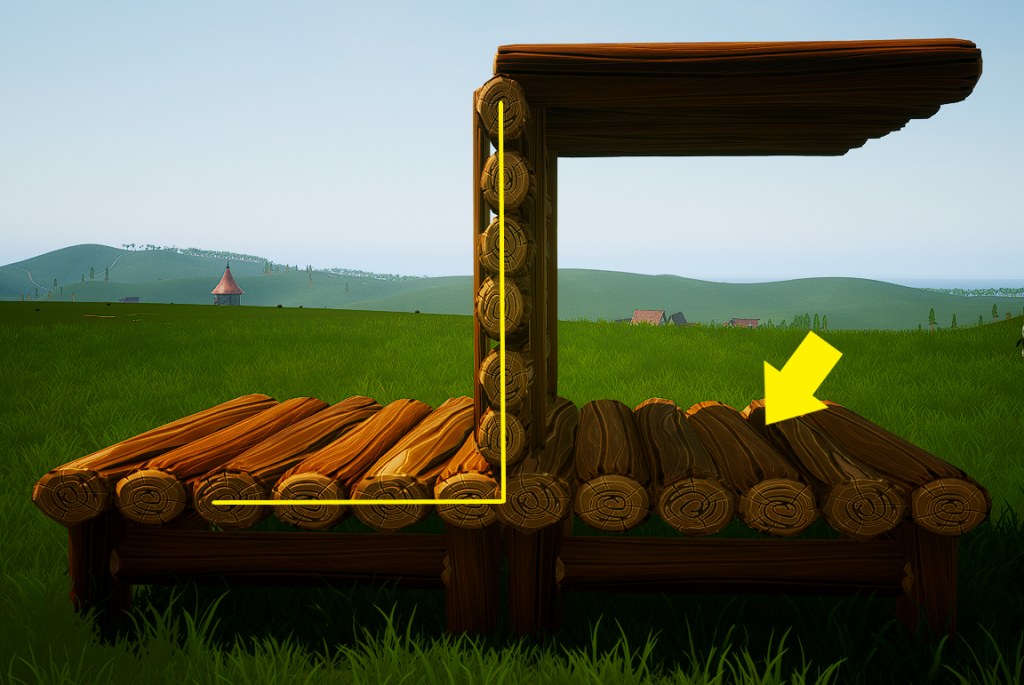
Ceilings must be built over an existing Foundation and it will remain in place if that Foundation (Marked with Yellow Arrow) is demolished or destroyed but it will need rebuilding to replace another Ceiling Piece.
Available at level 5.
Available at level 13.
How to build
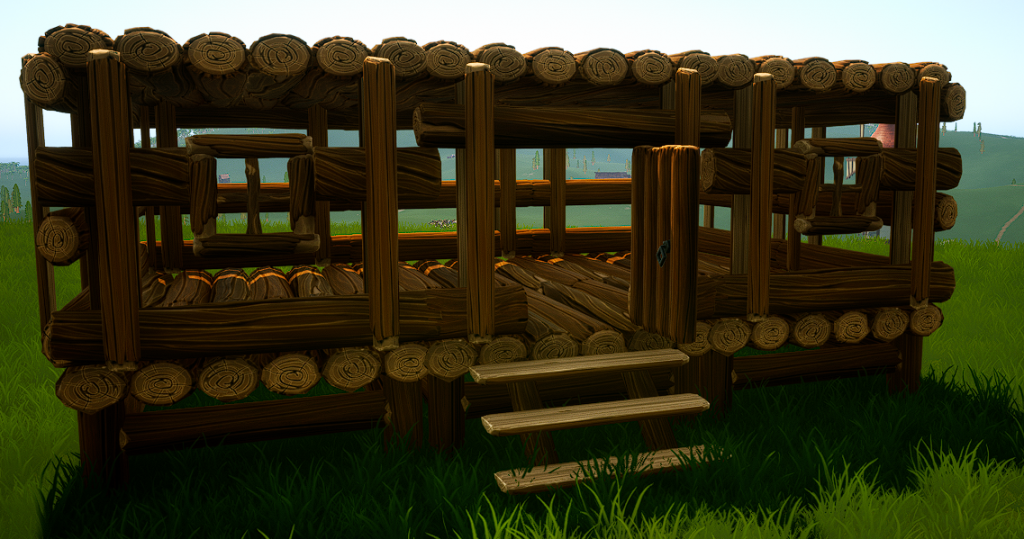
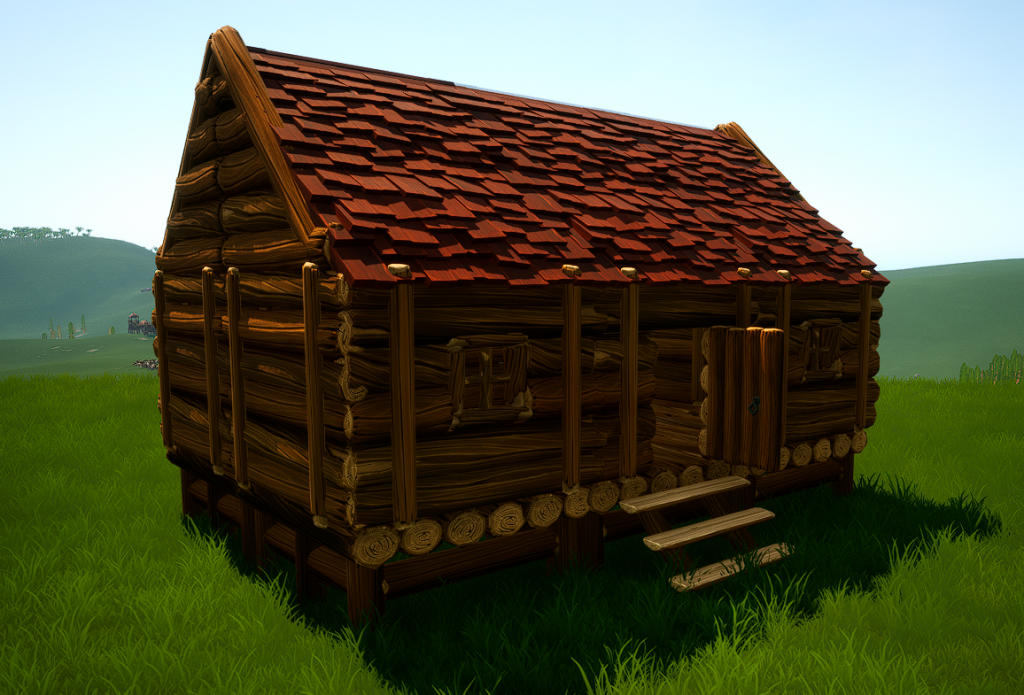
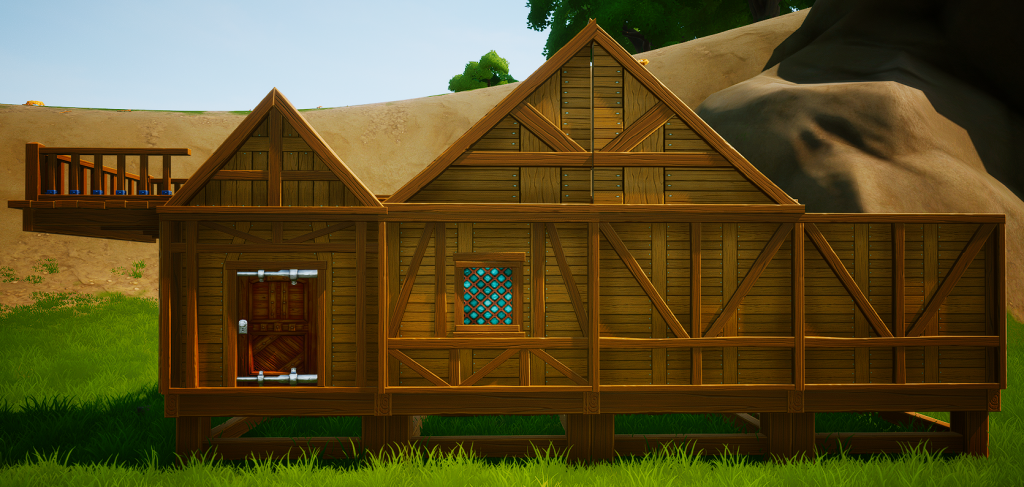
Encumbrance (weight) and Stamina use is problematic during building so its best to work with a few pieces at a time and a 3×2 Cabin is good for a Starter Base to expand upon later.
- How to build a small 3×2 cabin with flat Ceilings.
- Destroying the flat Ceilings and upgrading to Sloped Roof pieces.
- Adding a Porch (or an Airlock if playing PVP).
Some bits are sped up as it’s just the completing the Walls and Windows.
building actions
Upgrading
Wooden Building pieces (apart from the Roof sections), Palisade Wall, Palisade Gates, Spikes and Chests can be upgraded in stages which consists of giving the piece a different appearance, more hit points (HP) and additional storage in the case of the Chest.
Approach the item and Press and hold “E” (Default) and select the top radial option with each upgrade having its own cost of various materials. Each stage must be completed before upgrading to the next level.
Only completed and undamaged pieces can be upgraded. Any damage must be repaired first and when upgraded the item will have new repair costs!
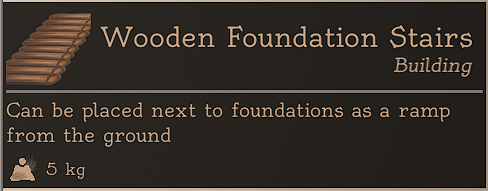
Wooden Foundation Stairs and Wooden Stairs are not upgradable.
Iron Rivets and Steel Rivets cannot be crafted, only found when looting or bought at the Trader.
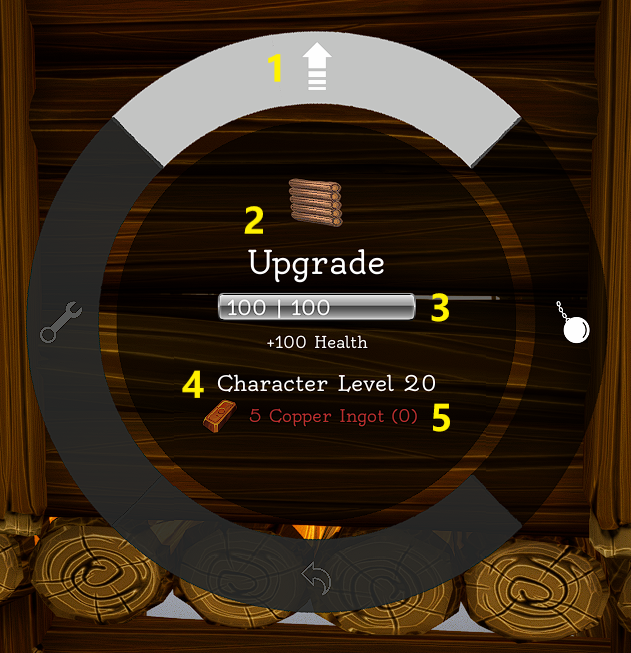
- Upgrade.
- Whats being upgraded.
- Current Health and Bonus.
- Level needed to upgrade.
- What’s needed to upgrade.
Items available to upgrade with Level needed to Upgrade, Costs, Bonuses and Additional features.
| Item | Copper | Iron | Steel | Hardened Wood | Plaster | |
| Wooden Foundation (1500 HP) | Cost | (Level 20) Copper Ingot x2 | (Level 32) Iron Ingot x4 Iron Rivets x2 | – | (Level 39) Hardened Wood x4 Iron Rivets x2 | (Level 44) Burnt Lime x4 Steel Rivets x2 |
| Bonus | +1500 Health | +3000 Health | – | +3000 Health | +6000 Health | |
| Wooden Wall (1000 HP) | Cost | (Level 20) Copper Ingot x4 | (Level 32) Iron Ingot x4 Iron Rivets x2 | – | (Level 39) Hardened Wood x4 Iron Rivets x2 | (Level 44) Burnt Lime x4 Steel Rivets x2 |
| Bonus | +1000 Health | +2000 Health | – | +2000 Health | +4000 Health | |
| Wooden Window Frame (1000 HP) | Cost | (Level 20) Copper Ingot x3 | (Level 32) Iron Ingot x4 Iron Rivets x2 | – | (Level 39) Hardened Wood x4 Iron Rivets x2 | (Level 44) Burnt Lime x4 Steel Rivets x2 |
| Bonus | +1000 Health | +2000 Health | – | +2000 Health | +4000 Health | |
| Wooden Window (300 HP) | Cost | – | – | – | (Level 39) Hardened Wood x2 Iron Rivets x2 | – |
| Bonus | – | – | – | +700 Health | – | |
| Wooden Ceiling (1000 HP) | Cost | (Level 20) Copper Ingot x3 | (Level 32) Iron Ingot x4 Iron Rivets x2 | – | (Level 39) Hardened Wood x4 Iron Rivets x2 | (Level 44) Burnt Lime x4 Steel Rivets x2 |
| Bonus | +1000 Health | +2000 Health | – | +2000 Health | +4000 Health | |
| Wooden Door Frame (1000 HP) | Cost | (Level 20) Copper Ingot x3 | (Level 32) Iron Ingot x4 Iron Rivets x2 | – | (Level 39) Hardened Wood x4 Iron Rivets x2 | (Level 44) Burnt Lime x4 Steel Rivets x2 |
| Bonus | +1000 Health | +2000 Health | – | +2000 Health | +4000 Health | |
| Wooden Door (1000 HP) | Cost | (Level 20) Copper Ingot x3 | (Level 32) Iron Ingot x4 Iron Rivets x2 | – | (Level 39) Hardened Wood x4 Iron Rivets x2 | (Level 44) Burnt Lime x4 Steel Rivets x2 |
| Bonus | +1000 Health | +1000 Health | – | +2000 Health | +4000 Health | |
| Wooden Triangle Wall (500 HP) | Cost | (Level 27) Copper Ingot x3 | (Level 36) Iron Ingot x2 Iron Rivets x2 | – | (Level 39) Hardened Wood x2 Iron Rivets x2 | (Level 45) Burnt Lime x2 Steel Rivets x2 |
| Bonus | +500 Health | +1000 Health | – | +1000 Health | +2000 Health | |
| Side Gable Roof (500 HP) | Cost | (Level 27) Copper Ingot x2 | (Level 36) Iron Ingot x2 Iron Rivets x1 | – | (Level 39) Hardened Wood x2 Iron Rivets x1 | (Level 45) Burnt Lime x2 Steel Rivets x1 |
| Bonus | +500 Health | +1000 Health | – | +1000 Health | +2000 Health | |
| Palisade Wall (1000 HP) | Cost | (Level 27) Copper Ingot x8 | (Level 36) Iron Ingot x8 Iron Rivets x4 | (Level 40) Steel Ingot x10 Steel Rivets x4 | – | – |
| Bonus | +1000 Health | +2000 Health | +2000 Health | – | – | |
| Palisade Gate (1000 HP) | Cost | (Level 27) Copper Ingot x8 | (Level 36) Iron Ingot x8 Iron Rivets x4 | (Level 40) Steel Ingot x10 Steel Rivets x4 | – | – |
| Bonus | +1000 Health | +2000 Health | +2000 Health | |||
| Spike (200 HP)( 7-13 Damage) | Cost | (Level 18) Copper Ingot x2 | (Level 30) Iron Ingot x2 | (Level 40) Steel Ingot x2 | – | – |
| Bonus | +200 Health +20% Damage | +400 Health +50% Damage | +800 Health +100% Damage | – | – | |
| Wooden Chest (500 HP)(32 Slots) | Cost | (Level 15) Copper Ingots x8 | (Level 31) Iron Ingots x10 Iron Rivets x5 | (Level 37) Steel Ingots x10 Steel Rivets x5 | – | – |
| Bonus | +500 Health +8 Slots | +1000 Health +8 Slots Harder to Pick | +1000 Health +8 Slots Harder to Pick | – | – | |
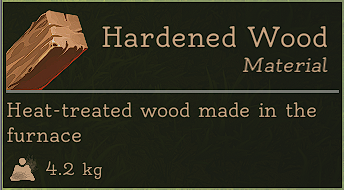
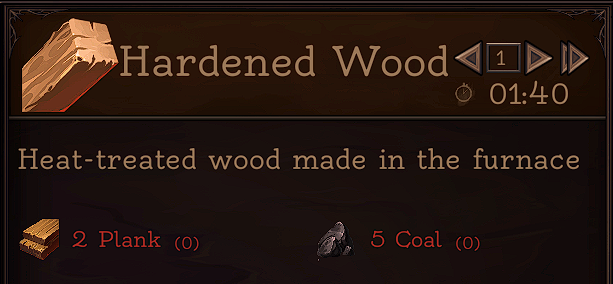
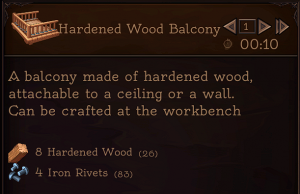
Hardened Wood
Once a Wooden Building piece has been upgraded to Copper and then Iron, the structure can be upgraded to Hardened Wood (HW). Note that for the Window it is the only upgrade option.
The ability to craft Hardened Wood in the Furnace is unlocked at Level 37 but its not until level 39 that the main building upgrades are unlocked with the Roof ends at level 40 along with the Hardened Wood Balcony.
Planks are made in the Plank Station with Coal (found mostly in map centre woodland) needing to be mined with a high quality Pickaxe.
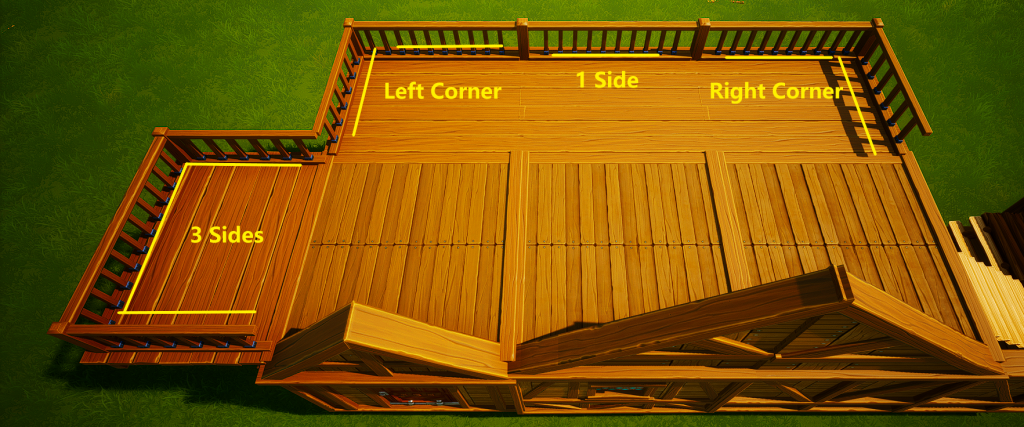
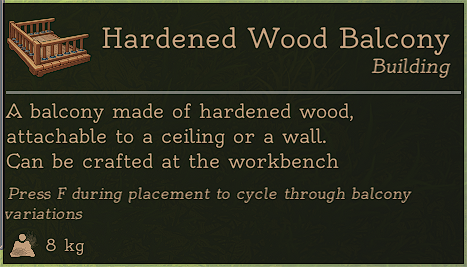
Press “F” to cycle through the Hardened Balcony variants when placing it for the 4 different options and it’s crafted in the Workbench.
Unlike Ceilings, Hardened Wood Balcony pieces do not need Wooden Foundations underneath and they are not upgradable.
Iron Rivets x4
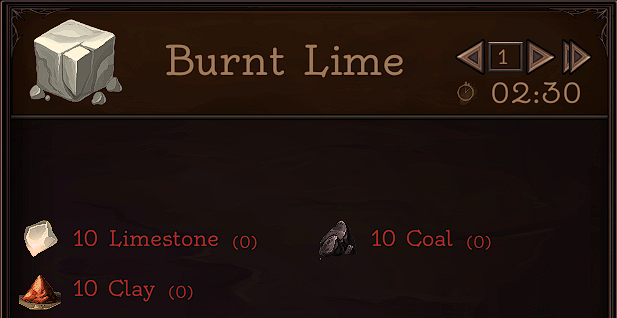
plaster
Once a Wooden Building piece has been upgraded to Copper, Iron and then Hardened Wood, the structure can be upgraded to Plaster.
Plaster upgrade is made using Burnt Lime which is crafted from putting mined Limestone in the Furnace with Coal and Clay.


Repairing
Anything that was Crafted or built can be repaired. If the item is below 50% Health then the repair materials are doubled. An item must be repaired first (if damaged) to be upgraded.
The materials needed to repair an item will be made of of the initial construction cost. IE- Wooden Wall needs Logs. Once upgraded the repair costs will change!
Approach the item and Press and hold “E” (Default) and select the left radial option with each repair having its own costs of various materials.
If successful, a triple hammer hit audio cue will sound or if not an error message shows.
Item repair is done using the Hammer icon in the Inventory.
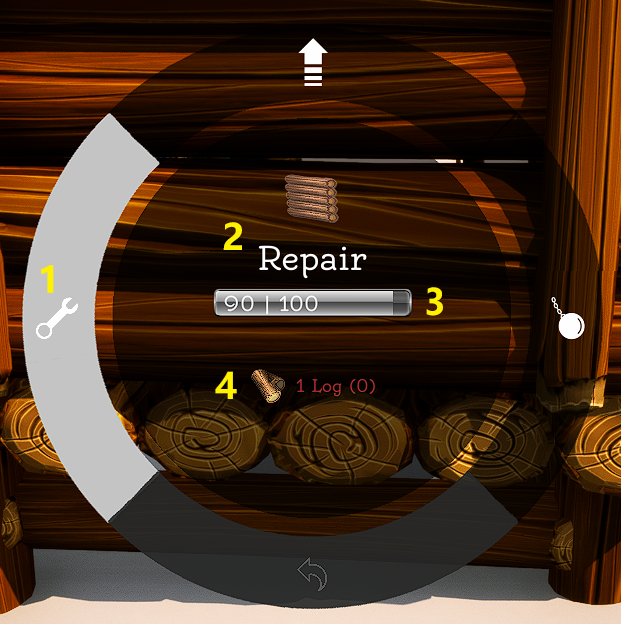
- Repair.
- What’s being repaired.
- Current Health.
- Material required for repair.
Demolishing
Approach the item and Press and hold “E” (Default) and select the right side radial option.
*Only undamaged structures will give back the 50% of the resources when first crafted and 50% of the upgrade materials (if upgraded). If damaged it will just destroy the item. If a Foundation is demolished then any connecting Walls and Ceiling will fall as well!
*It will show 100% resources returned if all 4 parts of the Blacksmith Armour are worn (Body, Trousers, Hands and Feet).
Blacksmith Armour requires 4pts put into the Plate Carrier skill to wear it unencumbered and is crafted in the Armour Bench requiring a total of 210 leather for all 4 parts.

- Demolish.
- The item highlighted.
- Resources returned.*
relocating
Any item that is crafted and can be placed in the world can be relocated (or picked back up within 60 secs). Approach the item and Press and hold “E” (Default) and select the bottom radial option. The item will remain where it is but a “ghost” image will show its facing and where to place it.
A red lined sphere will show how far the item can be moved from its initial placement site (no matter how many times its moved) which is now roughly 14 (Update v0.5.9 increased this) Foundation squares and the “ghost” image will turn red if the item being relocated goes past this boundary.
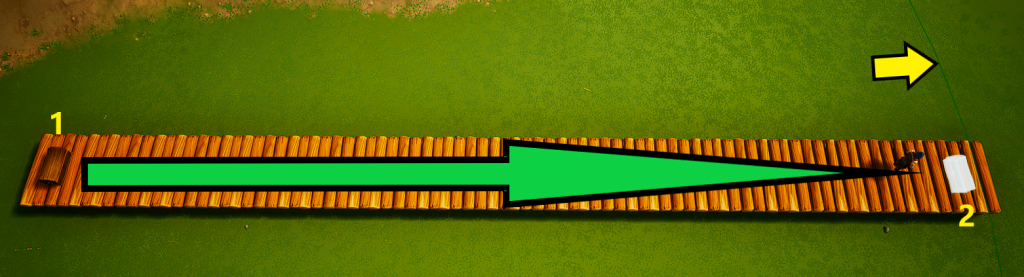
- Chest first place here.
- Chest relocated to here.
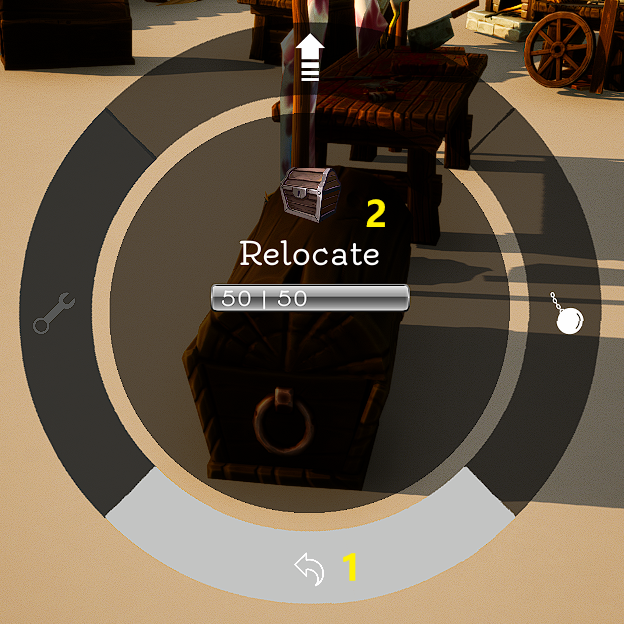
- Relocate.
- What’s being moved.
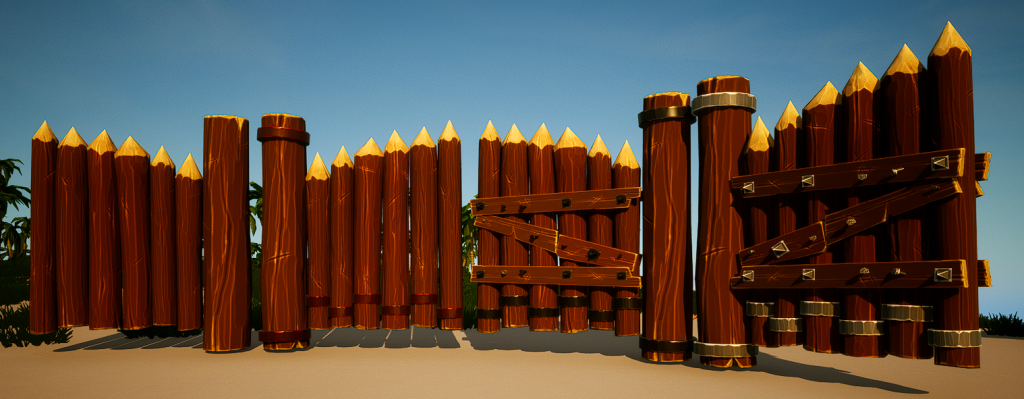
wooden Fencing
Wooden Fence and Wooden Gate are unlocked at Level 19 and are made in the Workbench using Planks x5 and Logs x1 each.
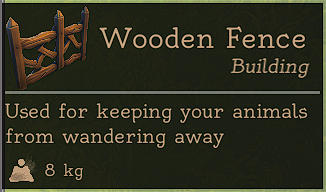
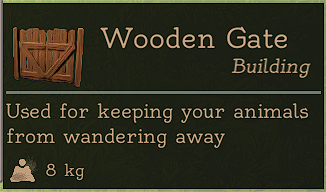
Each Fence piece has 300 HP and cannot be upgraded but they can be climbed over.
Fencing does not currently snap to each other.
Wooden Gates are usable when on horse back.
palisade and spike
Palisade Wall and Palisade Gate are unlocked at Level 13 and crafted in the Fortification Table.
The Fortification Table is unlocked at Level 13 and crafted in the Workbench.
Palisade Gates can also be used as double doors but only crafted in singles.
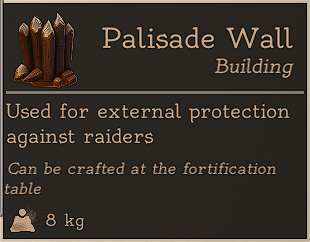

Palisades do not currently snap to each other and each piece has 1000 HP and can be upgraded but they cannot be climbed over.
Spike
Spikes are unlocked at level 4 and can be crafted on person initially or later in the Fortification Table.
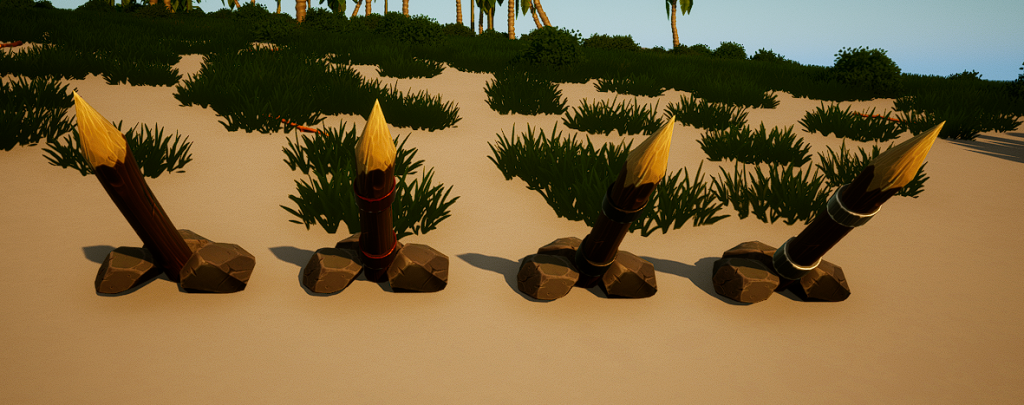
The Palisades and Spikes offer the best defence against Horde Nights.
Spikes do damage but also take damage (4-6 HP) when doing so and will need repairing.
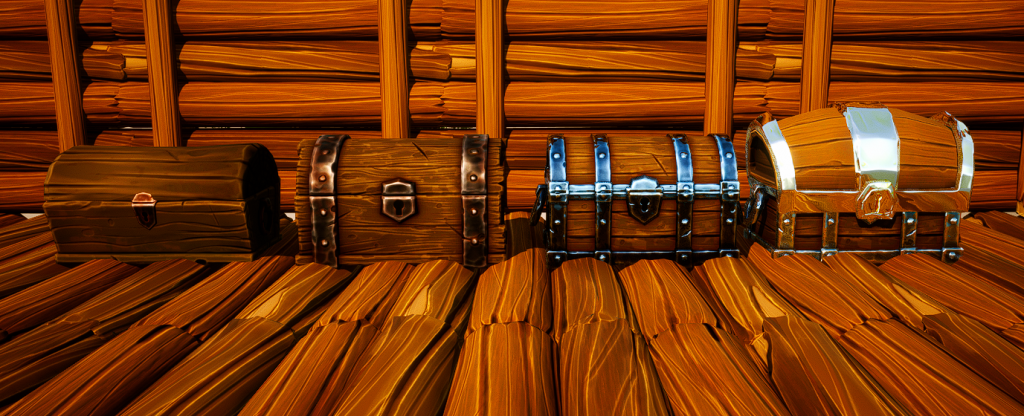
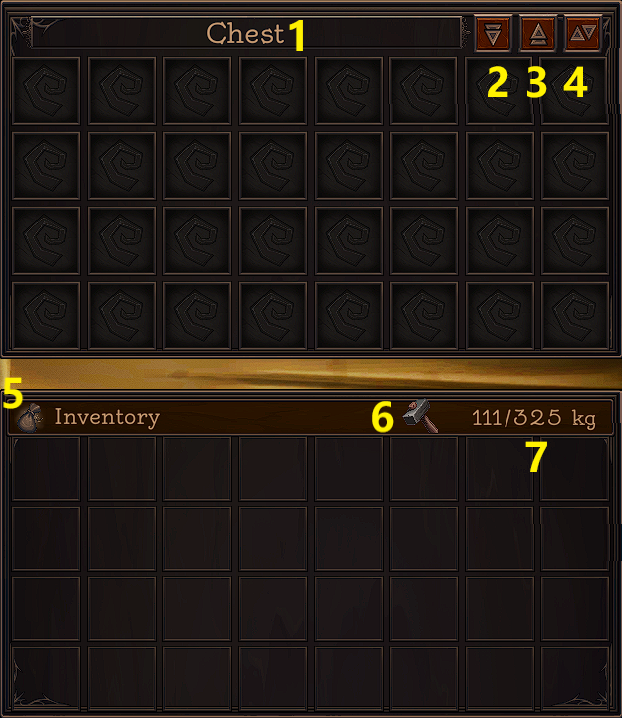
Chests
Wooden Chests are made on person requiring Planks x4 and Stone x10.
- Chest Name can be edited here.
- Take All (R).
- Store Similar (C).
- Sort.
- Sort Player Inventory (click on Bag icon).
- Repair Items (if have correct materials) in Inventory or worn.
- Current Inventory Weight/ Max Weight before being encumbered.
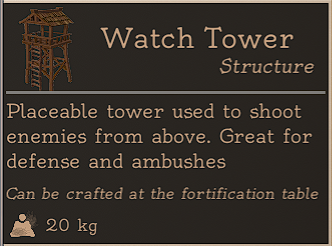
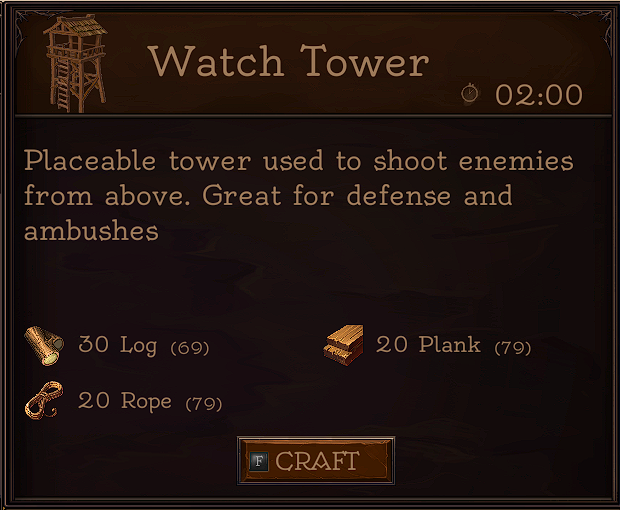
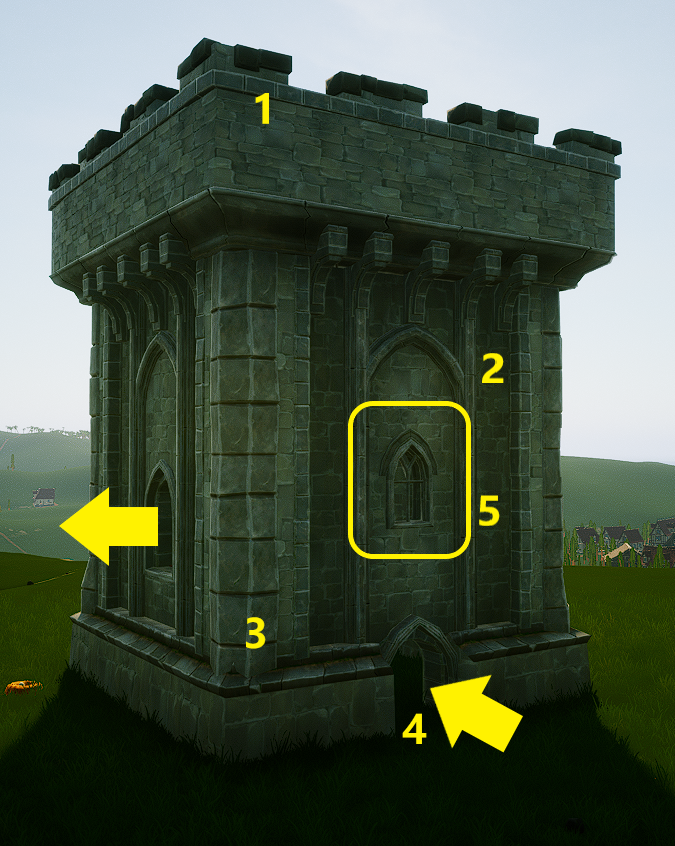
Watchtower
Watch Tower is unlocked at Level 22 and are crafted in the Fortification Table.
They have 1000 HP and cannot be upgraded.
Crafted using Log x30, Plank x20 and Rope x20.
Reports have stated that Giant Trolls can one shot this Structure!
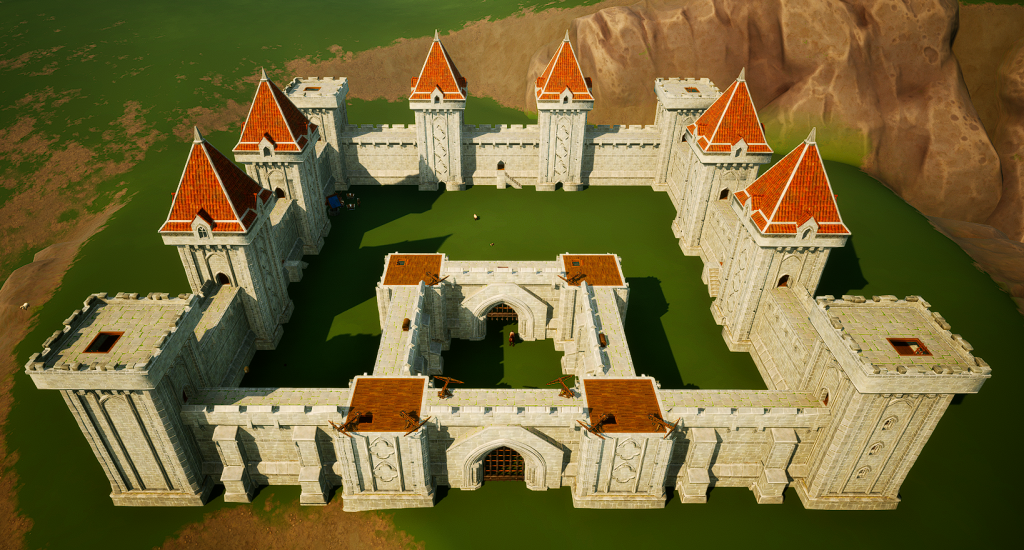
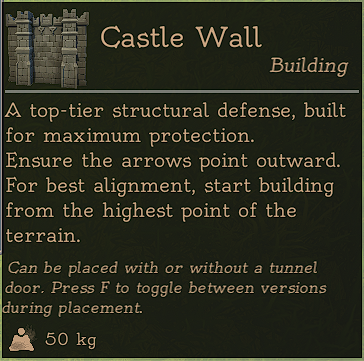
castle
Castles Walls and Castle Tower Pieces are unlocked at level 46 with the Castle Stairs at level 47. They are made from Stone Bricks and Obsidian (Steel Ingot for the Gate) and crafted in the Fortification Table. Stone Bricks are made in the Furnace (using Sharp Stone) and Obsidian is mined in the Desert Pyramids in the Northern Island.
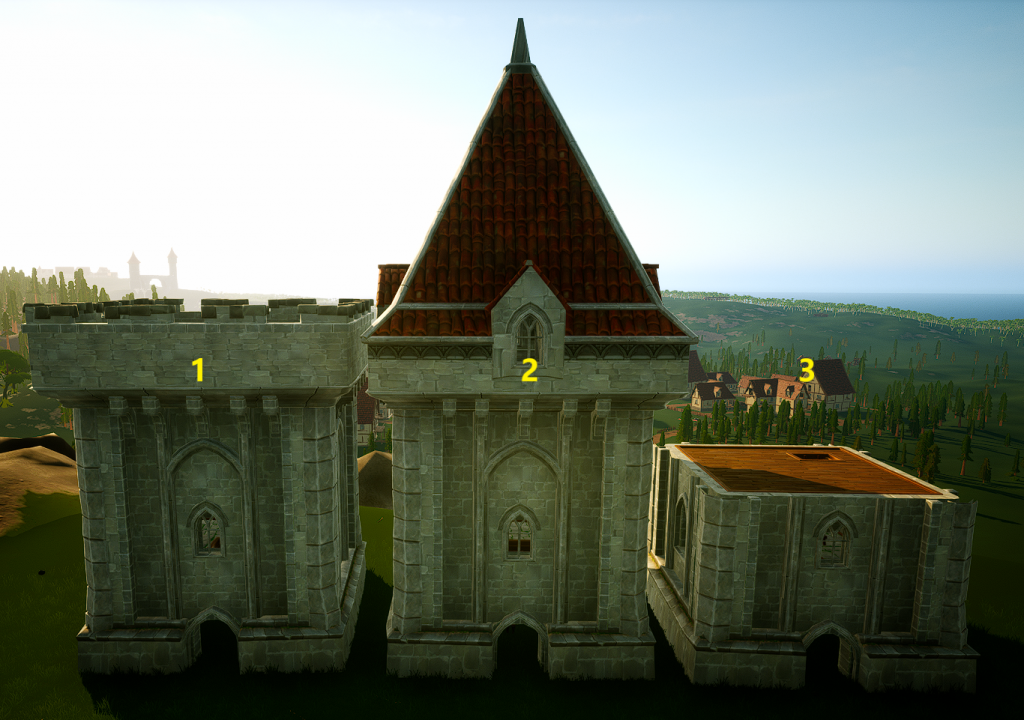
Castle Towers made up of 3 sections, Castle Tower Base, Castle Tower Middle and Castle Tower Top.
Castle Walls snaps to a Castle Entrance or a Castle Tower Base. Castle Entrance snaps to a Castle Wall or a Castle Tower Base. Castle Tower Base snaps to a Castle Wall or a Castle Entrance.
A Castle Tower must have a Castle Tower Base but can have many Castle Tower Middles to fit against the Castle Walls with a Castle Tower Top being optional but it finishes the look of a castle. A Castle Tower Top will not fit on a Castle Tower Base.
Obsidian x6
Obsidian x8
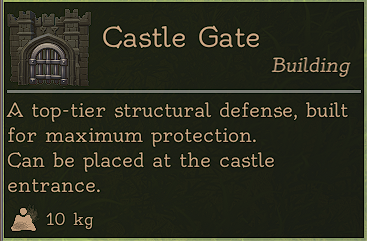
- Castle Gates can be put in an Inner and Outer position to double security (10000 HP each) and usable on Horseback.
- Walkable Battlements.
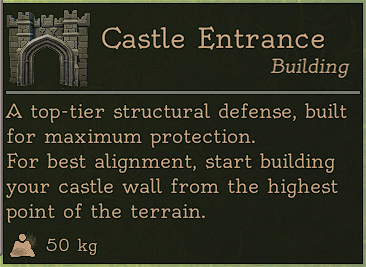
- Castle Entrance requires Gates (20000 HP).
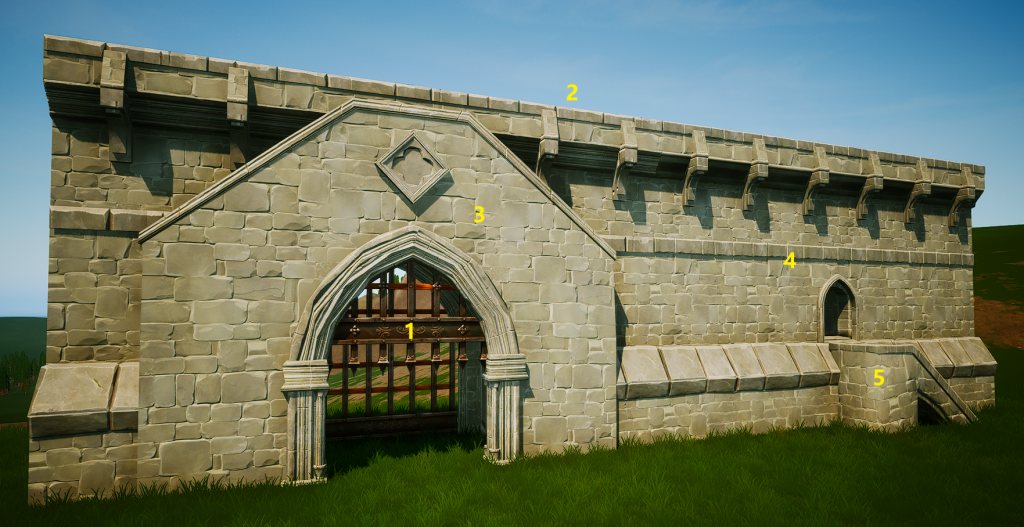
- Castle Wall has 2 variations with Green Arrows showing in and out facings when placing (20000 HP).
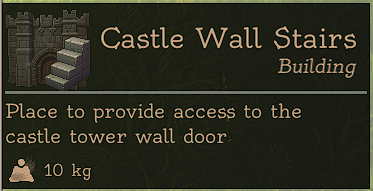
- Castle Wall Stairs used on the inside (2000 HP).
Castle Entrance have no variations only able to rotate to face In/Out and also have no through way passages (4). Castle Wall has 2 variations, one being the full Wall and the other is with a Doorway to which the Castle Wall Stairs are attached.
- Castle Wall piece (Facing Out).
- Battlements with access to and from a Castle Tower Middle.
- Upper Floor with access to and from a Castle Tower Middle
- Lower Floor with access to and from a Castle Tower Middle.
- Castle Wall Stairs attachment placing.
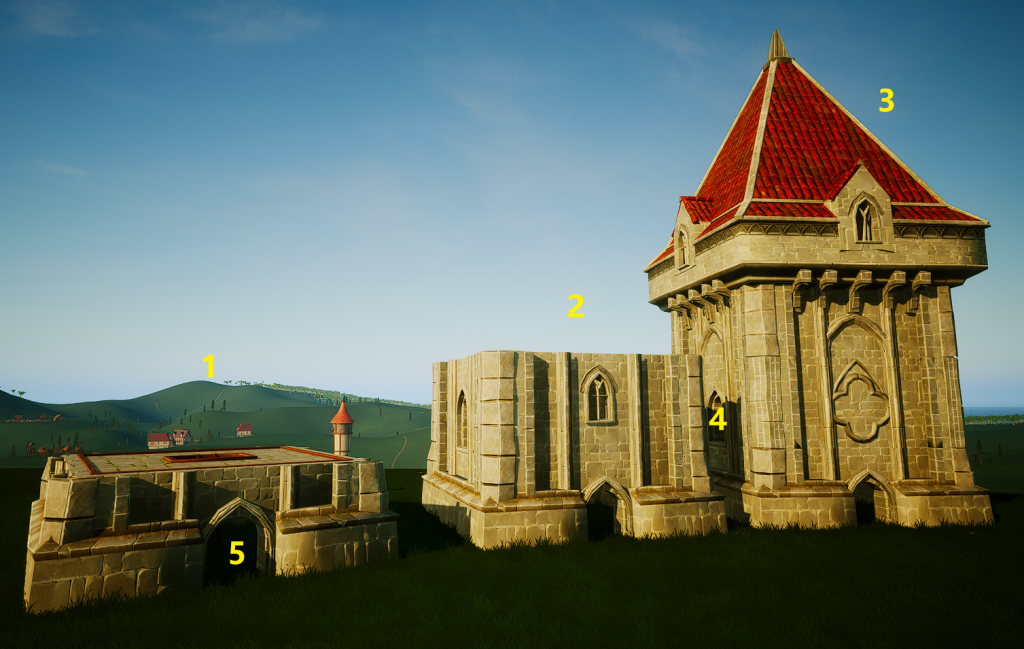
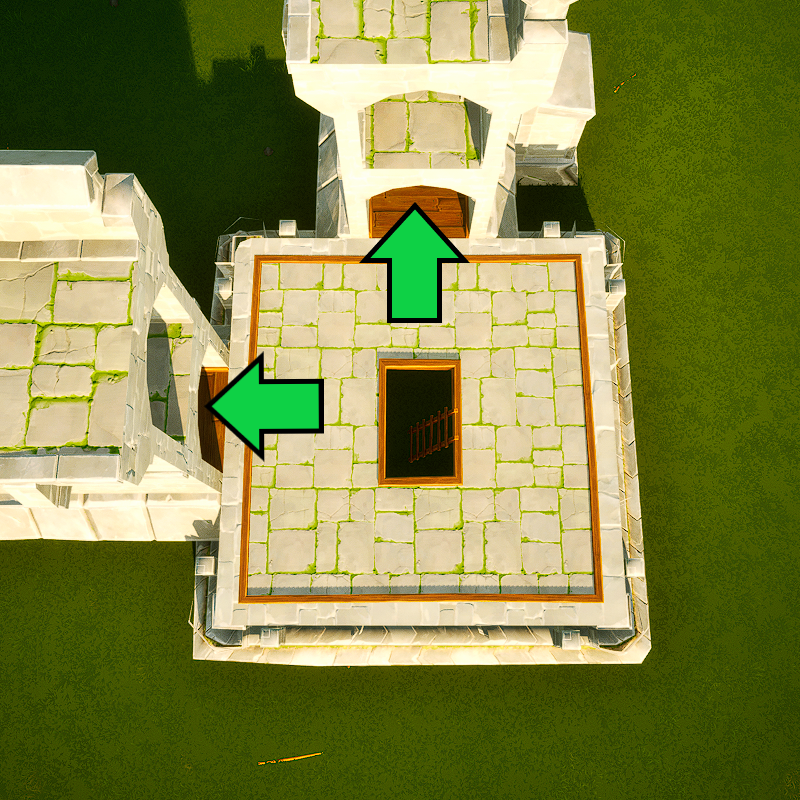
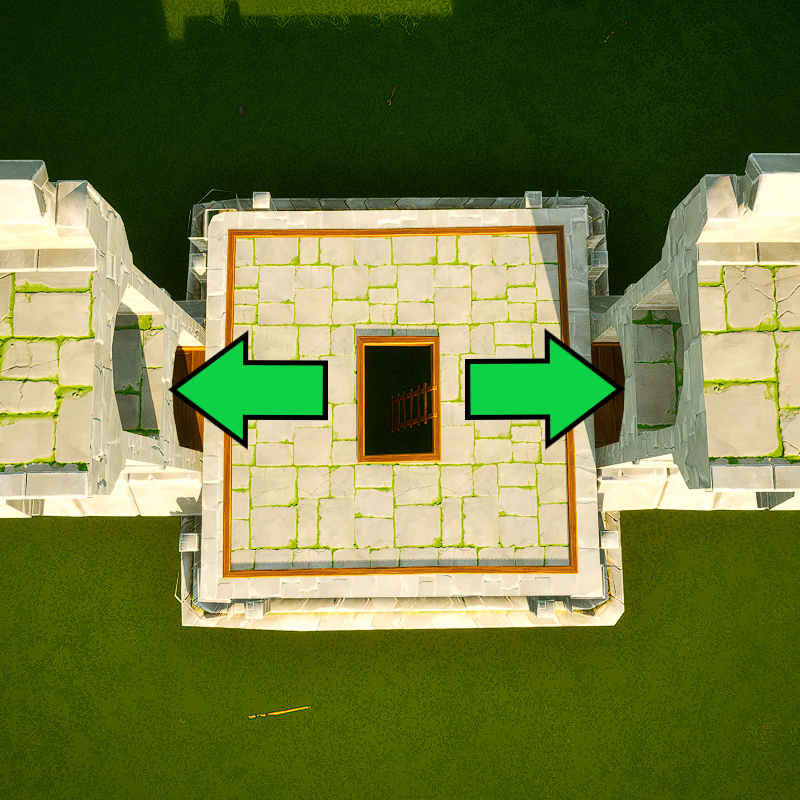
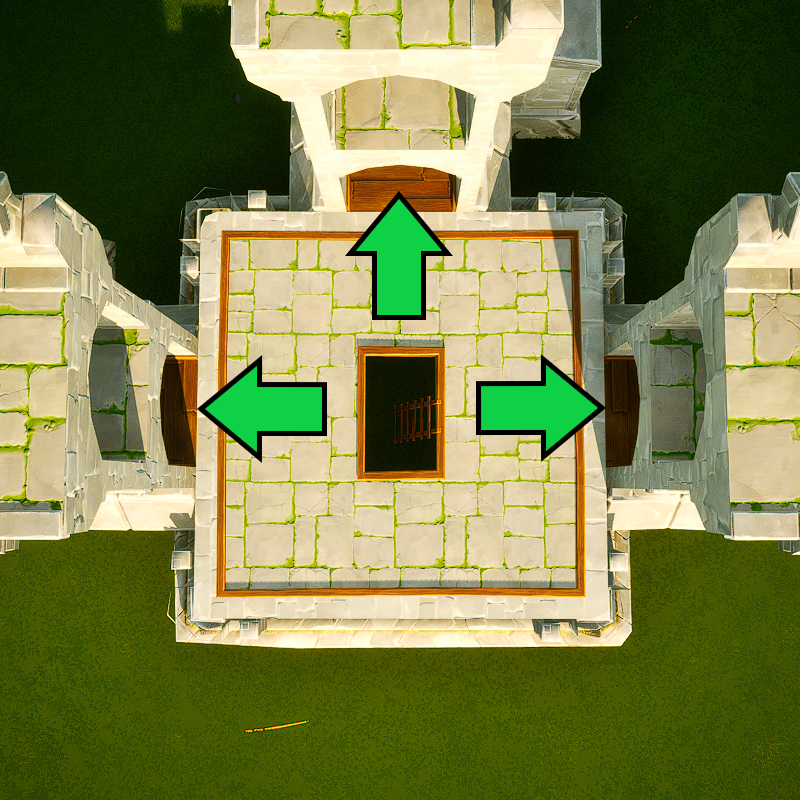
The 4 images below show how Castle Tower Middles can be stacked to provide access to Castle Walls and the Battlements with the Green Arrows showing access points. It is showing one Castle wall and a castle tower with no further connections, see here for more options of connecting Castle Walls/Castle Entrances to Castle Tower Bases/Middles.
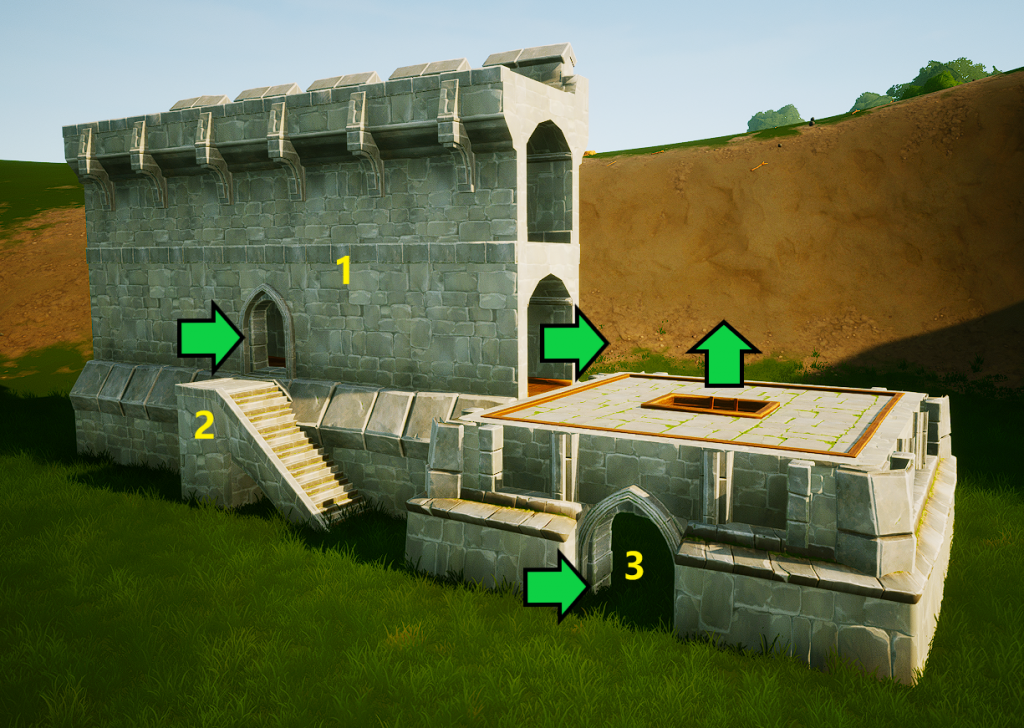
- Castle Wall.
- Castle Wall Stairs.
- Castle Tower Base.
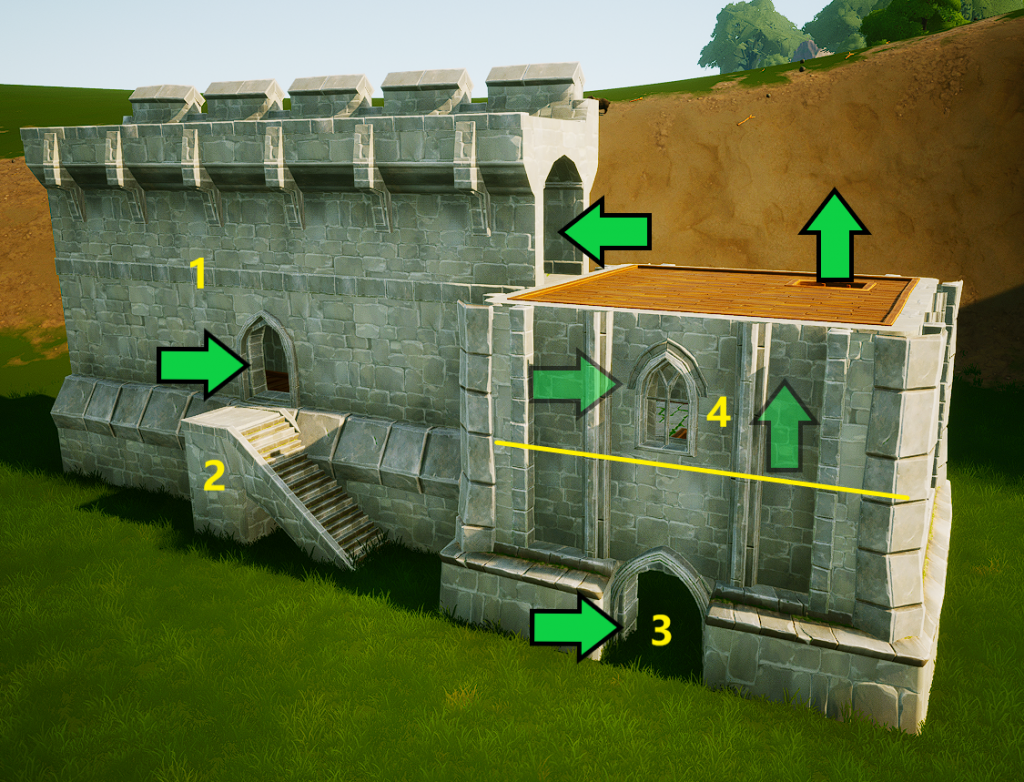
- Castle Wall.
- Castle Wall Stairs.
- Castle Tower Base.
- Castle Tower Middle (#1).
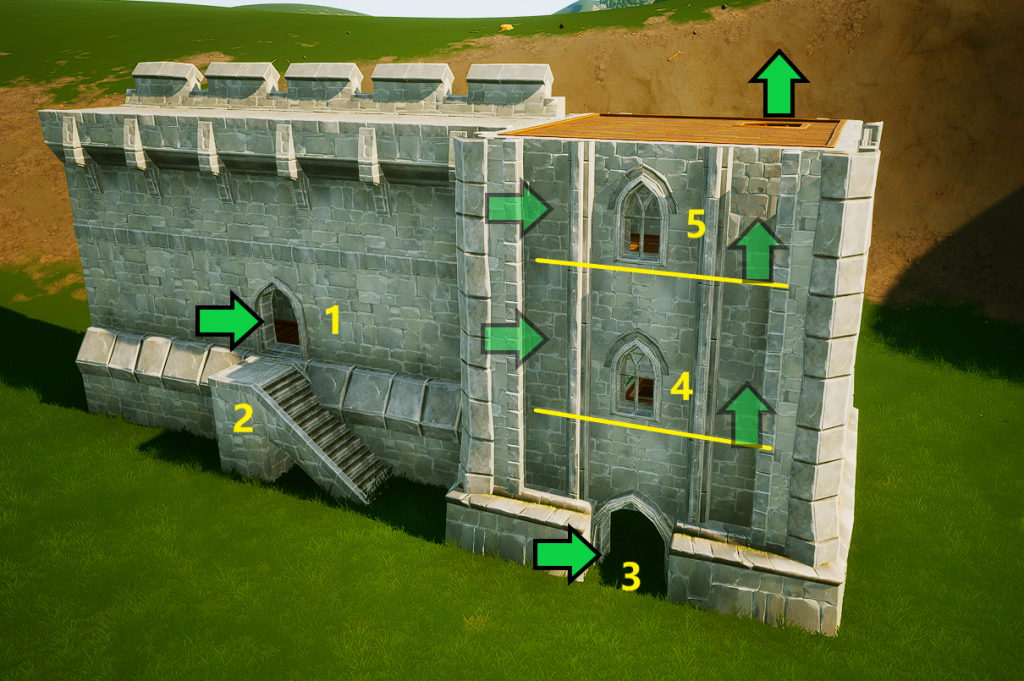
- Castle Wall.
- Castle Wall Stairs.
- Castle Tower Base.
- Castle Tower Middle (#1).
- Castle Tower Middle (#2).
- Castle Wall.
- Castle Wall Stairs.
- Castle Tower Base.
- Castle Tower Middle (#1).
- Castle Tower Middle (#2).
- Castle Tower Middle (#3).
- Can be left open or use a Castle Tower Top to finish it off.
- There is no access between the Lower Floor and Upper Floor passageways within a Castle Wall, Castle towers provide this.
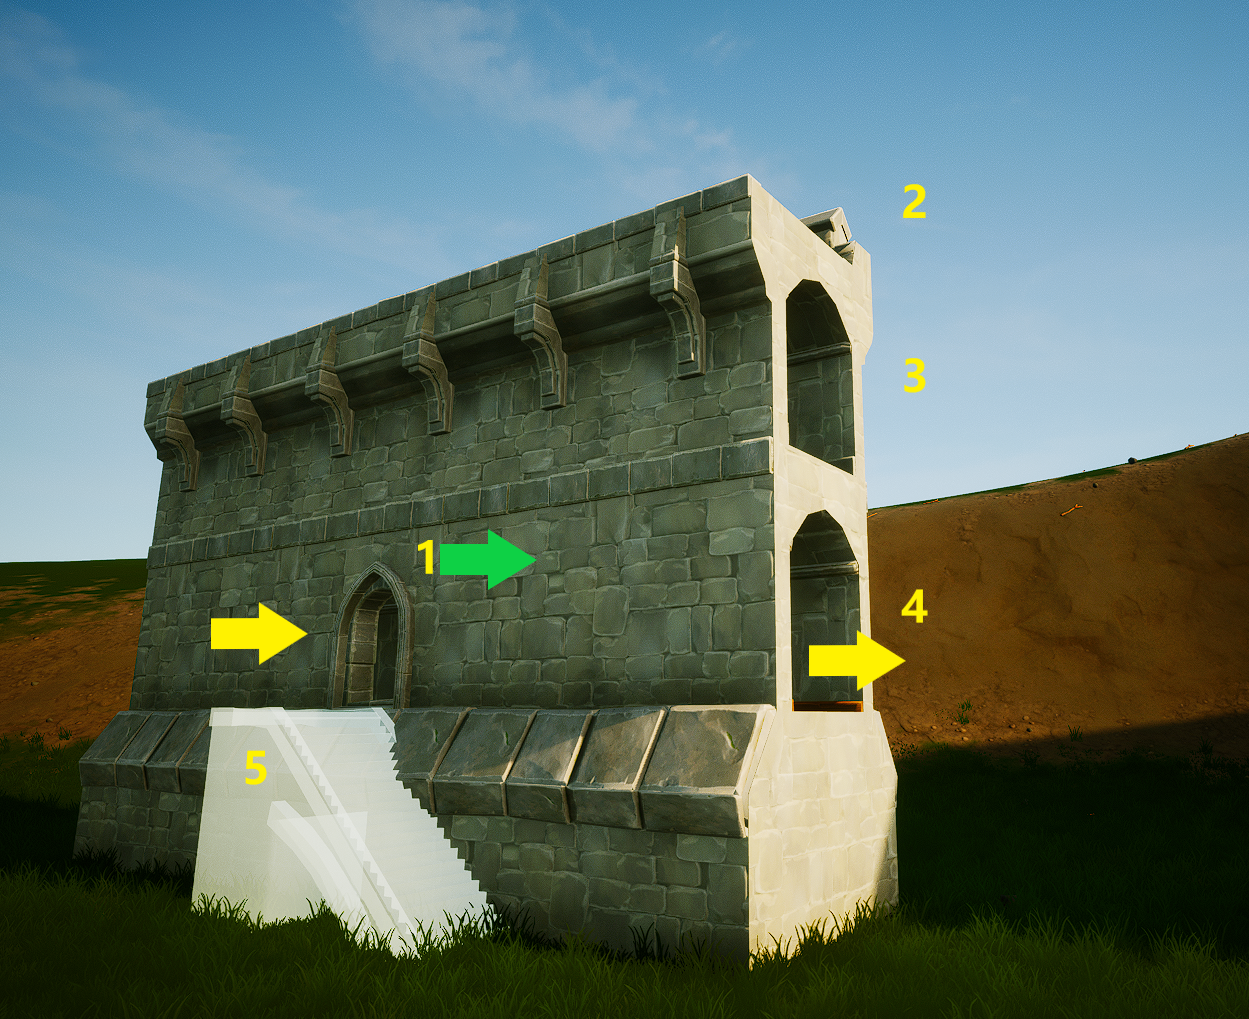
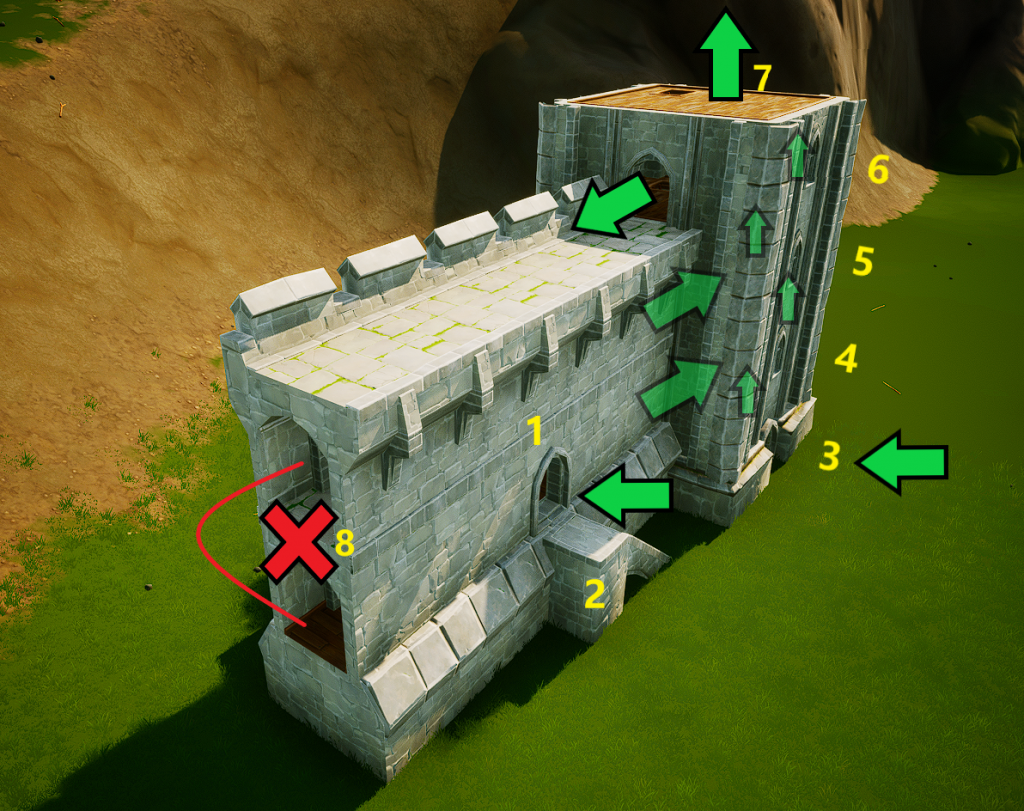
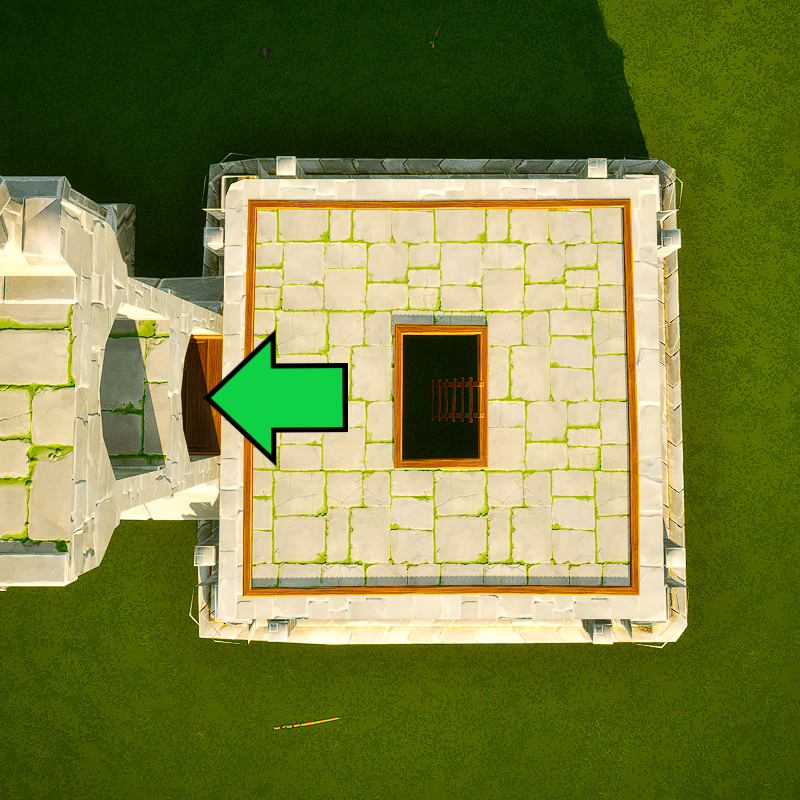
Castle Tower Base
- Castle Tower Base is the first piece to place when building a Tower (20000 HP).
- Castle Tower Middle is used to connect through passage (4) to the Walls (20000 HP).
- Castle Tower Top has 2 variations (20000 HP).
- Passage connecting a Castle Tower Middle to a Castle Wall.
- Ground floor entrance. See here for info.
Castle Tower Base has no variations only 2 facings. Ensure all Doorways are facing in as these give access to the whole construction! >
Demolishing the Castle Tower Base with Middles and Tops placed will only return the Base materials and destroy the others!
Castle Towers Middle
Castle Towers Middle has 4 variations with each one having 4 facings. The below images show each variation (Press “F“) of Doorway with the non Green Arrow facings either a window or wall decor. This is for linking up the Lower Floor, Upper Floor and Battlements passageways within the Castle Walls .
Pressing “Q” or “E” will rotate the Castle Tower Middle to allow connection of further Castle Walls and Castle Tower Bases/Castle Tower Middles depending on the layout to allow for small or large castle construction.
Castle Towers Top
Castle Towers Top have 2 variations and no facings:
- Flat top with crenellations and accessible with ladders in the centre.
- Red tile roof only accessible from ladders in the centre of the structure with minor visibility from the windows.
- Just a Castle Tower Base and Castle Tower Middle.
- Castle Tower Top.
- Castle Tower Middle.
- Castle Tower Base.
- Doorway not needed and Castle Tower Stairs will not connect to it.
- Castle Tower Stairs connecting if the tower base is raised high enough above the terrain (2000 HP)(see #6).
- Castle Tower Top.
- Castle Tower Middle.
- Castle Tower Base.
- Doorway into the Castle Tower Base if its placed on flat ground (see #5 on left) so Castle Tower Stairs not required.
- Window variation instead of Doorway.
Castle Designs