December 28, 2024 9 minutes read time
These are in no particular order. What things have you found you wished you knew before playing? If there is anything you think that I missed, let me know!
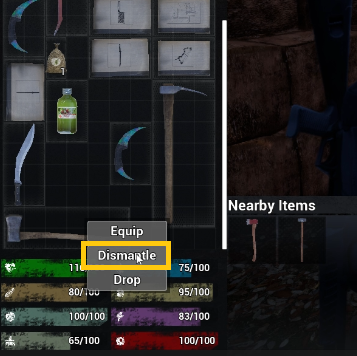
1. Dismantling Tools
It is common to find iron and steel tools at Farms, Police Stations, Military bases, etc. To dismantle a tool for Iron or Steel Ingots place the tool in your inventory or a storage container, equip any small knife, then RMB on the tool and select Dismantle.
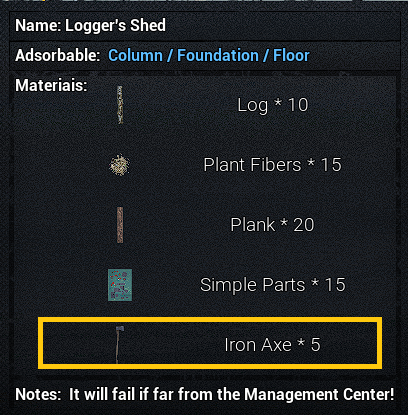
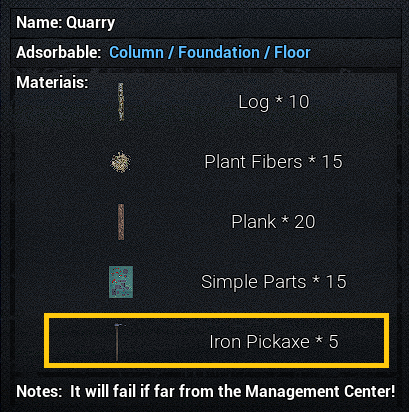
The Steel Pickaxe is provably the best tool in the game considering you can mine any stone or ore in three swings. While some tools can be used as melee weapons or dismantled for Iron and Steel Ingots, it is recommended that you refrain from dismantling every tool you find while looting. The Steel Pickaxe is required for crafting the two Drilling Tools needed to unlock the Technology for the Well and build the Well. There are a few others tools used for crafting and building also. For example, you will need 5 Iron Pickaxes and 5 Iron Axes for the NPC Quarry and Logger’s Shed buildings as shown below.
2. Repairing Clothing & Armor
There are many clothing pieces that can be found while looting and each one has it’s own Speed, Defense, Scratch Resistance, Heat Resistance, Cold Resistance, and Head Protection for head gear. Most importantly, each item has durability (Condition).
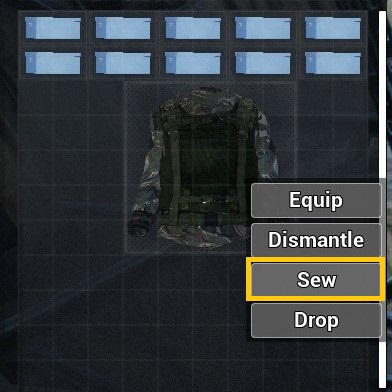
It is important to be aware of your equipped clothing’s durability. If possible it is recommended to check before and after a fight. Repaired clothing could mean the difference between losing a few health points and having to use your respawn point.
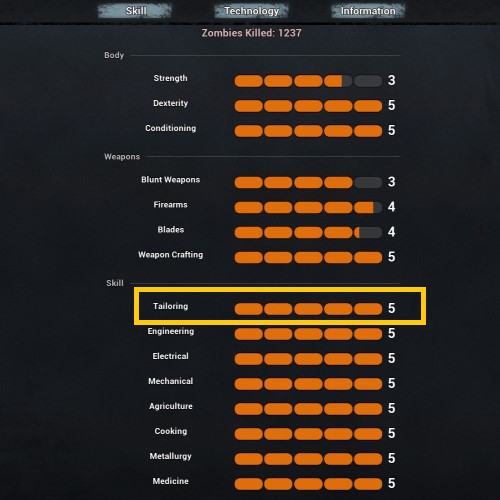
Use Clothing Repair kits to Sew the armor or clothing before it reaches 0% durability and is destroyed. This requires leveling your Tailoring skill. You can repair most items with Level 4, but will need Level 5 Tailoring to repair Hiking backpacks.
3. Player Stats

Your player stats can be found in the bottom left corner of your inventory. Each stat is connected to another stat. Water, Carbs, and Protein are connected to Fatigue Recovery. Antibodies and Health are connected, if your Antibodies reach zero your Health will be zero. The new Medical System creates even more connections where some illnesses have a substantial negative effect on Hygiene also.
You can hover over these stat bars in your inventory to see their names and more information. For example, if you hover over the purple Fatigue bar, it will say “For every 30 points missing, Damage is reduced by 25% (does not affect Firearms).
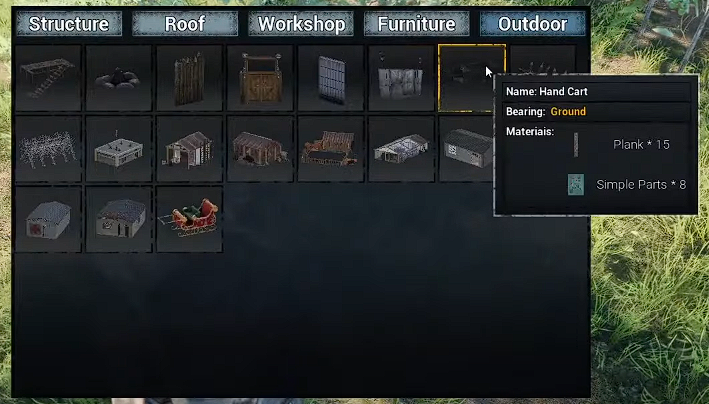
4. Hand Carts
You have the ability to build a cart directly from the Building Hammer menu as soon as you load into your world. A cart costs 15 planks (requires Crafting Bench and Logs) and 8 Simple Parts (can be looted OR crafted in Crafting Bench with 1 Iron Ingot, 1 Copper Ingot, and 1 Aluminum Ingot).
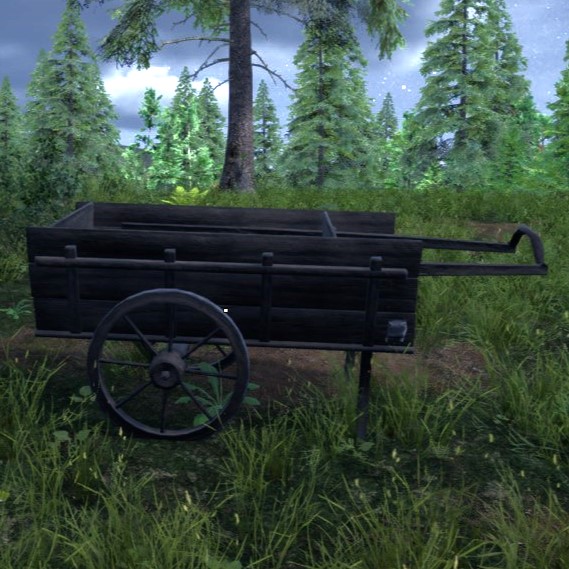
The cart acts as portable storage until you can find and Repair a Vehicle. The cart can hold 6 Large/Military/Hiking backpacks or 8 of the Camouflage Military backpacks.
5. Need a lot of Simple Parts & Advanced Parts
My favorite POIs to loot Simple Parts are the Apartments in B6 and E6 as well as Central Middle School in B6. For Advanced Parts, you can loot unrepairable vehicles on the roadways or there are Electronic Stores in the Mall and Mobile Stores in E6 that can be a great place if RNG is on your side.
Ultimately, you are going to have to make the many Simple and Advanced Parts you will need to build and craft the items during your play through. Simple Parts can be crafted in the Crafting Bench or the Machining Table (requires power) and Advanced Parts can only be crafted in the Machining Table (requires power).
6. Not So Obvious Dangers
If you have played Valheim, then you know trees are dangerous. The trees in No One Survived are similarly dangerous. Better to give the trees some extra space after you chop them.
Also, while you can currently swim without the worry of oxygen, the bicycles and vehicles cannot. If you drive your bicycle or vehicle too far into the water, you are ejected and will not be able to access it again…so do not drive through the water.
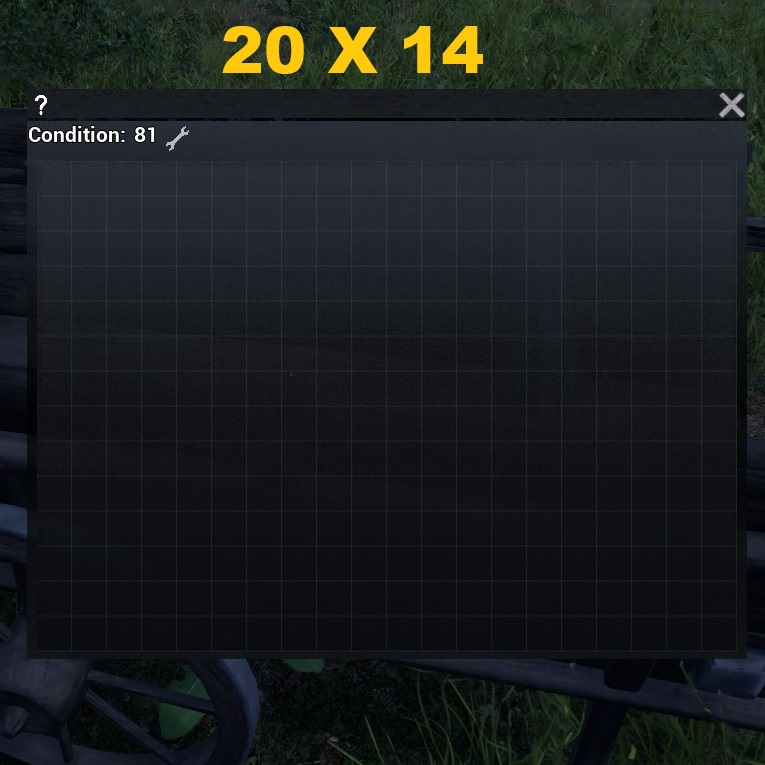
7. Grow Wheat Early On
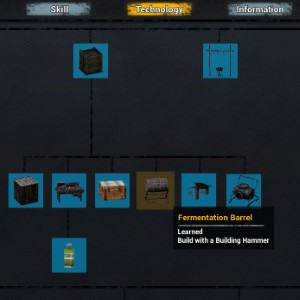
Admittedly, I am not great at farming, but growing Wheat and the fermentation of Wheat is a vital part of technological progression. In order to unlock the tech for Gunpowder which is required in Bullet Production, you need 2 Fermented Alcohol. Growing Wheat will be the less time consuming option to obtain this resource.
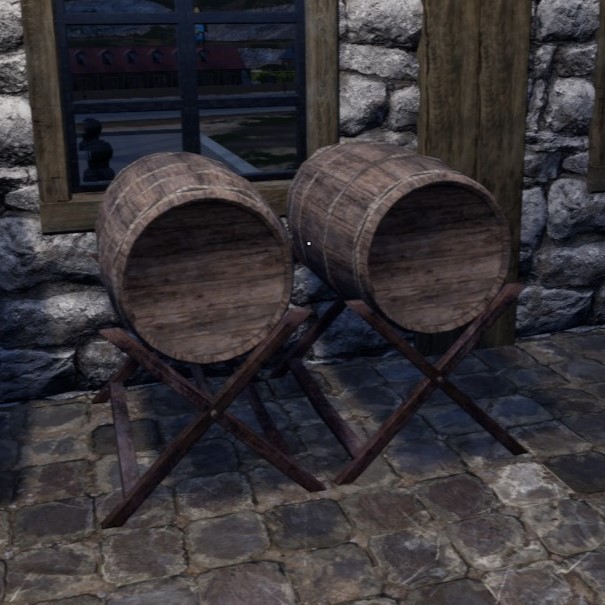
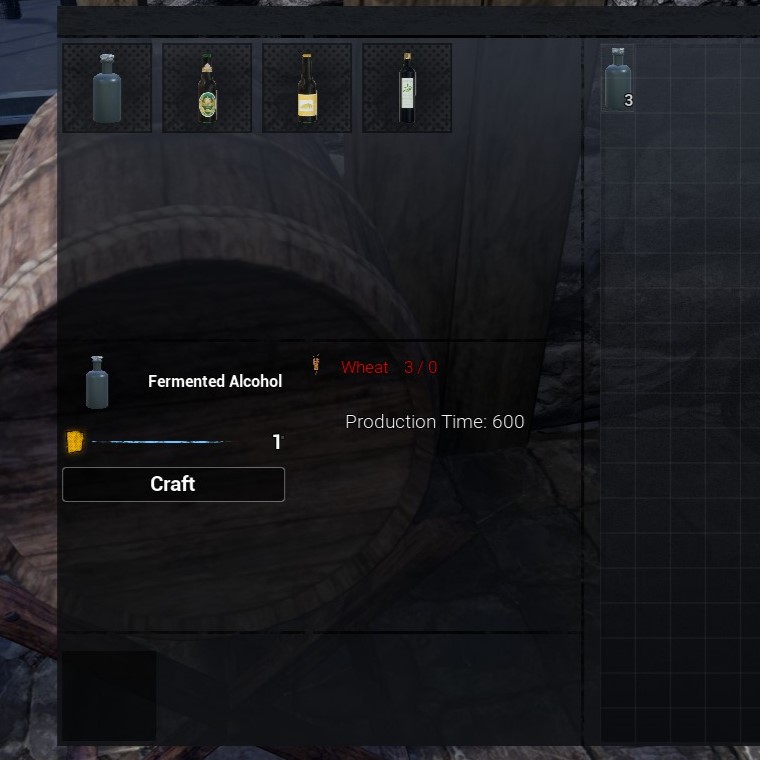
You need 6 Wheat total (3 Wheat per Fermented Alcohol) in a Fermentation Barrel and it currently takes 20 minutes in real time to ferment.
Here are a couple of other methods to obtain the 2 required Fermented Alcohol:
- The Trader in H1, Li Na, sells Fermented Alcohol, but her wares are RNG and she only sells one at a time. You would have to visit twice (consider your Merchant Restock Interval) and have RNG on your side to get two.
- Trade for Wheat at another Merchant Location, like Mike in E4 (Map 01). He will not have all the Wheat you need, maybe one or none, and the Wheat will rot in 10 days.
- Loot enough Wheat from refrigerators in POIs. Same issue with RNG and finding enough before Wheat expires.
- Loot Fermented Alcohol from the Bunkers. There are 2 Bunkers on the Map, but it will be heavily guarded.
8. How Loot Respawn Works
The loot respawn system was changed in November 2023 to increase game performance supposedly. Currently, the game will check for the last time you looted a loot container and if that time is greater than the number of days you have set for your world’s Loot Respawn Interval, then the game will populate the container with loot. Some containers will not spawn loot until your character is within 128 meter radius and all containers with Food Items will start rotting. The game remembers the loot you left in the containers, so if you left something behind last time you looted, it will still be there along with any new loot that gets spawned in. Containers that have never been looted will not spawn new loot until they after they are interacted with. No more days of full boxes with x4 loot respawns filling them!
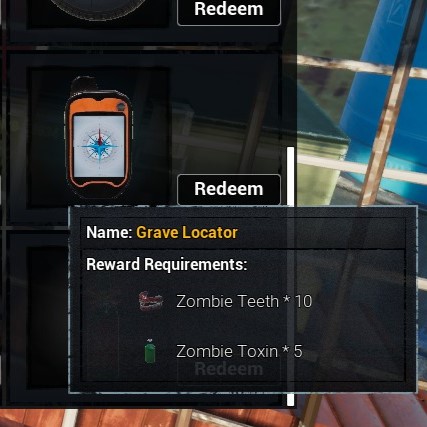
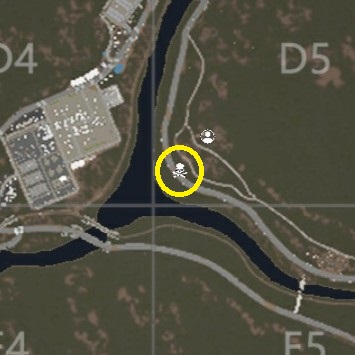
9. Grave Markers
***UPDATE 0.0.9.1. ADDED ABILITY TO LOG OUT OF THE GAME AND YOUR GRAVE WILL REMAIN AVAILABLE DURING NEXT LOGIN***
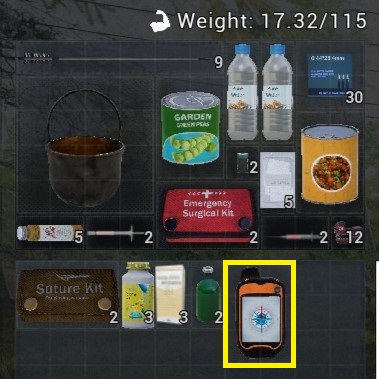
The game’s grave marker system is atypical to other survival games. There will be a physical cross marker in the world, but there is no Map Marker generated. This means you will need to remember the coordinates or general location of your death in order to recover your body and belongings or use a Grave Locator. Update 0.0.7.9 introduced the Grave Locator that can be obtained at Merchants (except Li Na in H1) in exchange for 10 Zombie Teeth and 5 Zombie Toxin. This locator must be in your Personal Inventory (pockets) or Backpack inventory prior to your death. Upon death, the Death Locator will be used and disappear from your inventory and your grave will be marked on the map by a skull and crossbones.
10. Building Walls 1 & 1/3 High
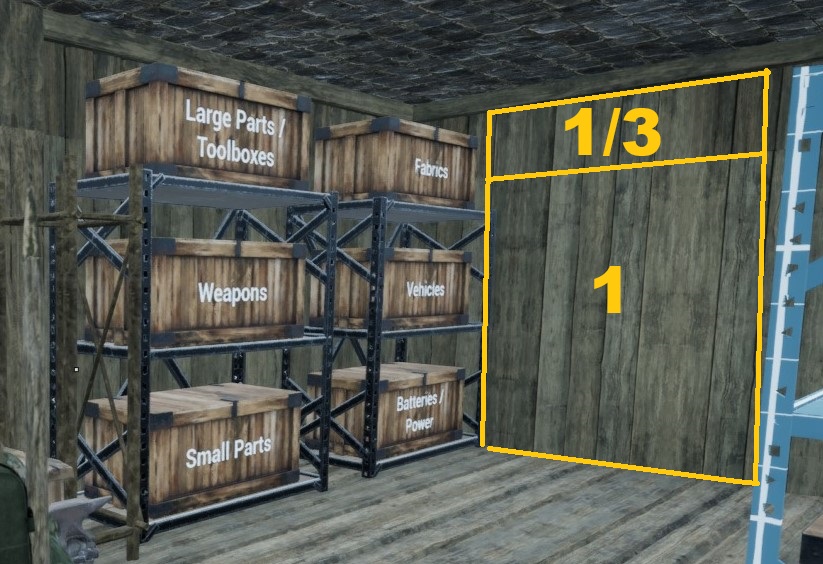
Why build 1 & 1/3 walls high? Storage racks. These racks can hold 3 Wooden or 3 Iron Boxes at 1 & 1/3 height. If you only build 1 wall high then you will not be able to maximize the storage capacity. Also you will feel less claustrophobic inside of your base in third person view.
Alternatively, you can build 1 wall high and use 45° Angle Roof pieces, you can still place the top third storage box on the rack.
11. Carrying backpacks & items
If you constantly find your character encumbered, then this one is for you. This is easier than slow walking or tapping “C” to do a Willy Wonka roll forward.
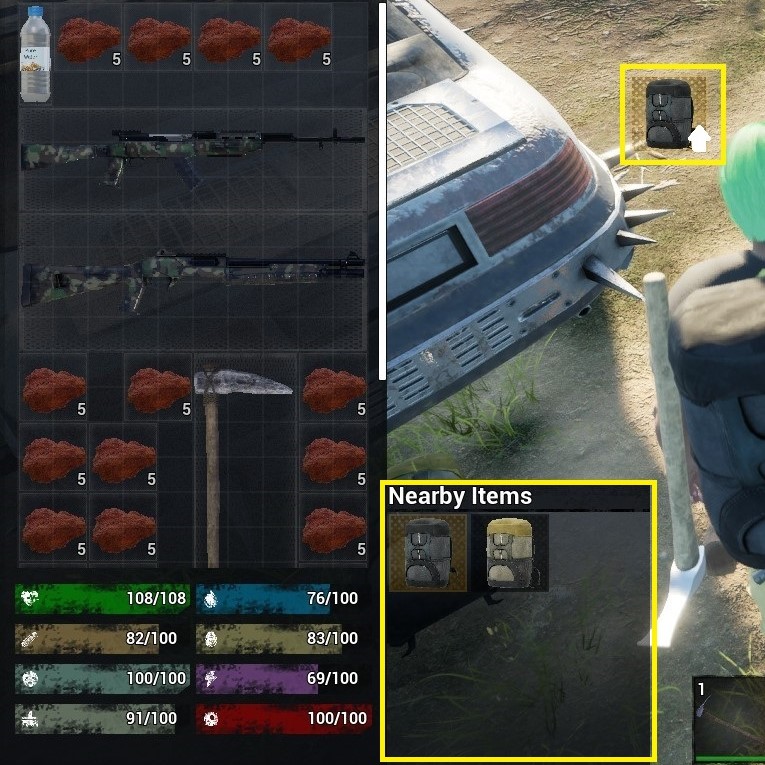
When you access your Character UI, you can unequip your backpack from your character by dragging the backpack out of the slot and onto the ground by clicking and releasing LMB. Once the backpack is removed it will be available in your Nearby Items. The Nearby Items UI can be accessed by opening your inventory. By clicking on and holding LMB, you can drag the backpack across your screen and carry it to another location. To place the backpack back on the ground to re-equip it, you open your inventory and click on the where you wish to place it using LMB.
You can also place the backpack into a vehicle, a storage crate, into a cart, or just anywhere on the ground. The same can be done for any kind of loot, resource, or anything else you can access from Nearby Items. This is handy when you have larger items you cannot fit in your inventory such as Generators, Solar Panels, Fuel Barrels, etc.
12. Using Emotes to restore Fatigue & Stamina
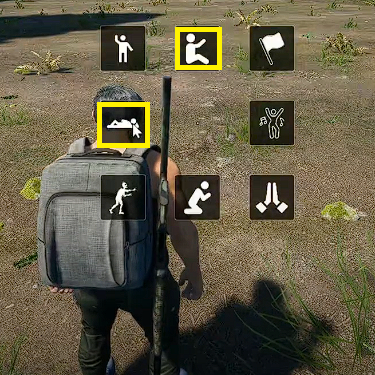
The default key binding for emotes is “I”. Press and hold “I” to open the emotes menu and select either option for sitting or laying down show below. This will cause the player to regenerate Stamina, Fatigue, and Health points if the other stats are above 70 points.
These two options are especially useful for multiplayer games when each player may have different fatigue levels, are in different areas of the map away from beds, or there are too many in the party to get everyone to sleep when you need it!